
In order for an employee to be able to access their paystub online, they need to be given their Payroll Engage credentials. Their Payroll Engage Credentials are created under their Individual Record.
Updating User Permissions to manage Payroll Engage Access
-
First go to File → Administration
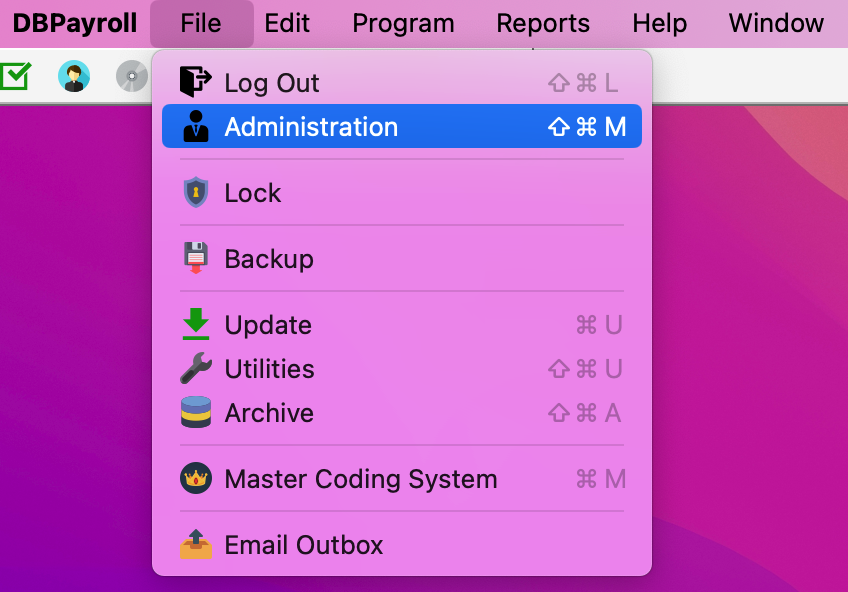
-
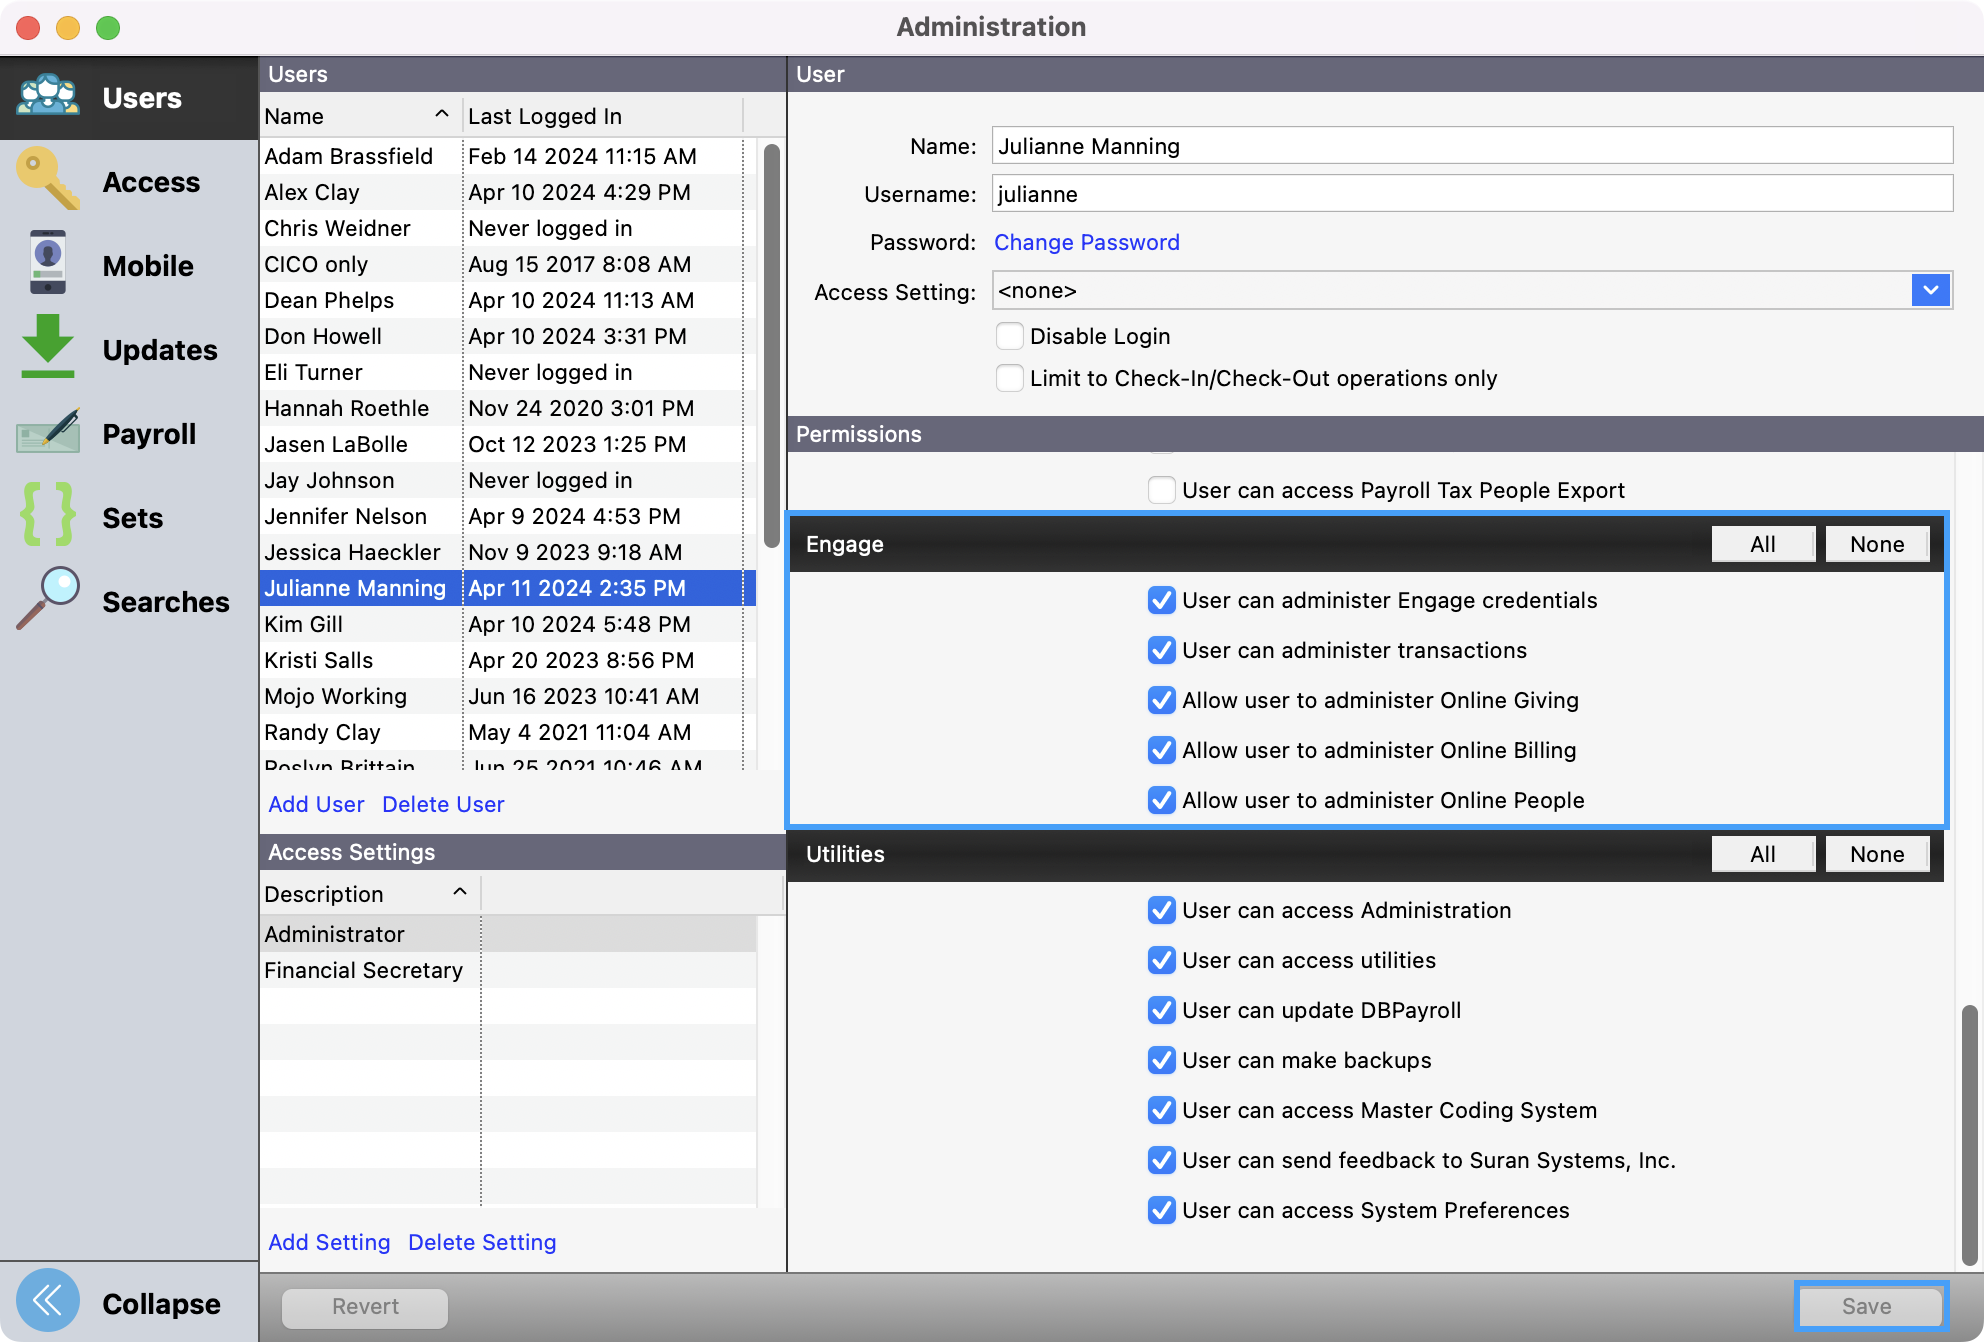
Select the User you want to add the permission to and then scroll to the Engage section under Permissions. Check all that apply and then click Save at the bottom right-hand corner.
Providing Payroll Engage Access for an Existing Employee.
-
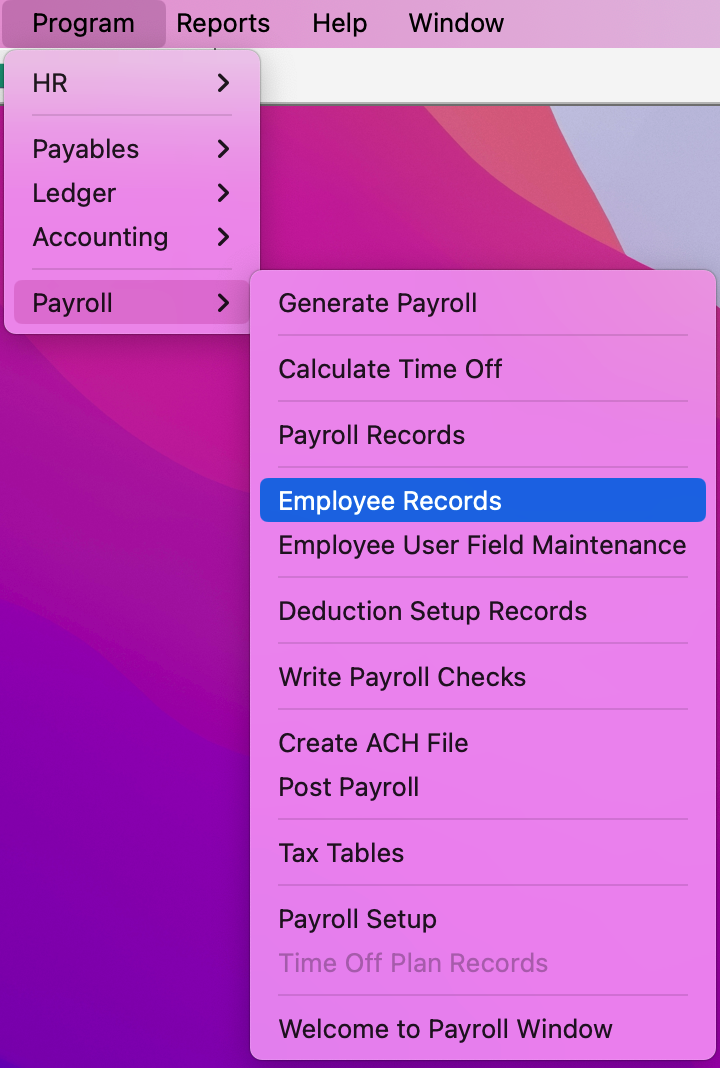
To provide Payroll Engage credentials to an existing Employee, first navigate to their Employee Record by going to Program → Payroll → Employee Record.
-
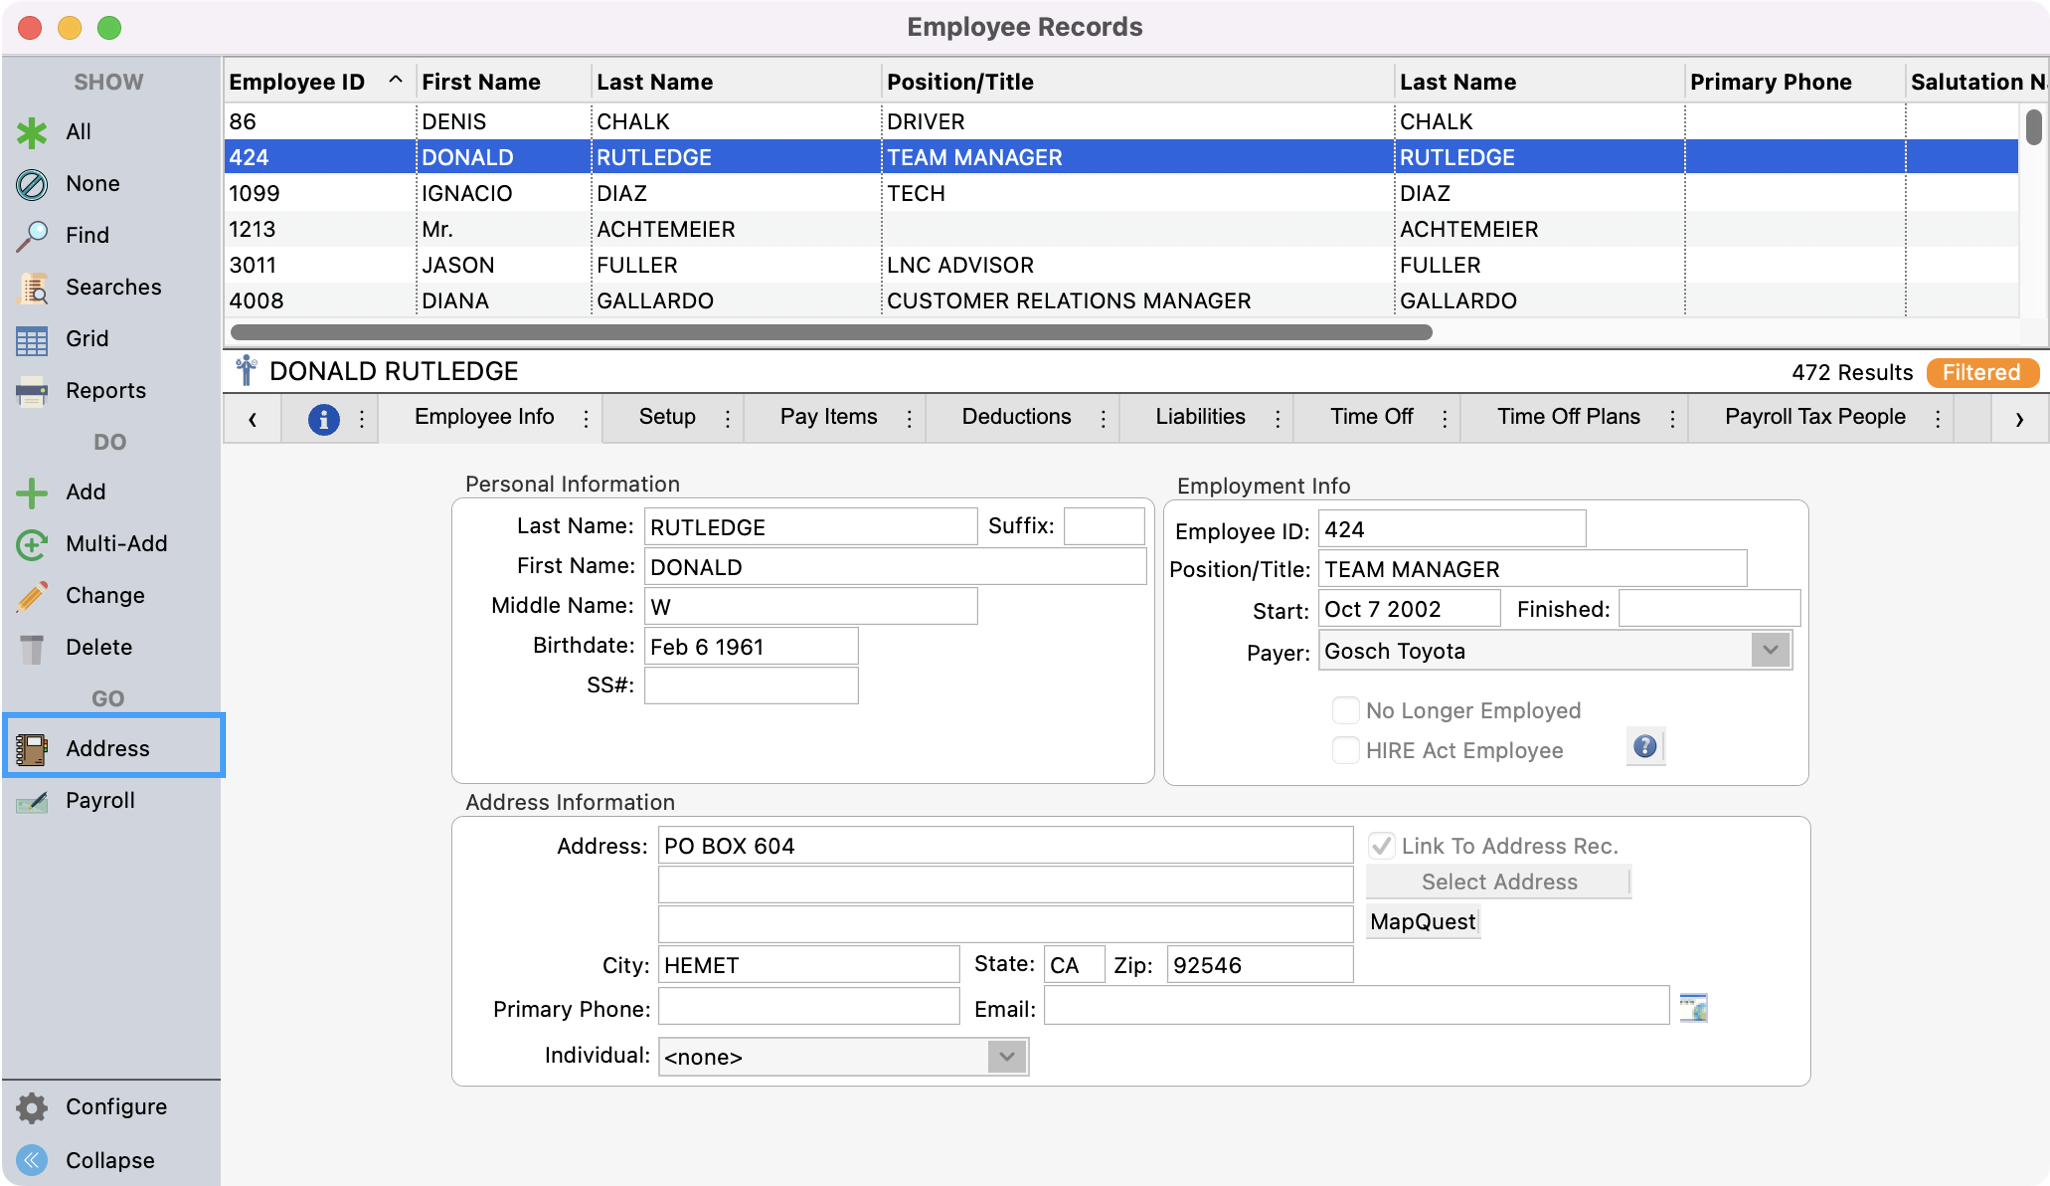
Next, in the Employee Records window search for your employee. Click to highlight their name and then click on Address from the left sidebar.
-
This will take you to the employee’s Address record. In the Address record window, click Change from the left sidebar.

-
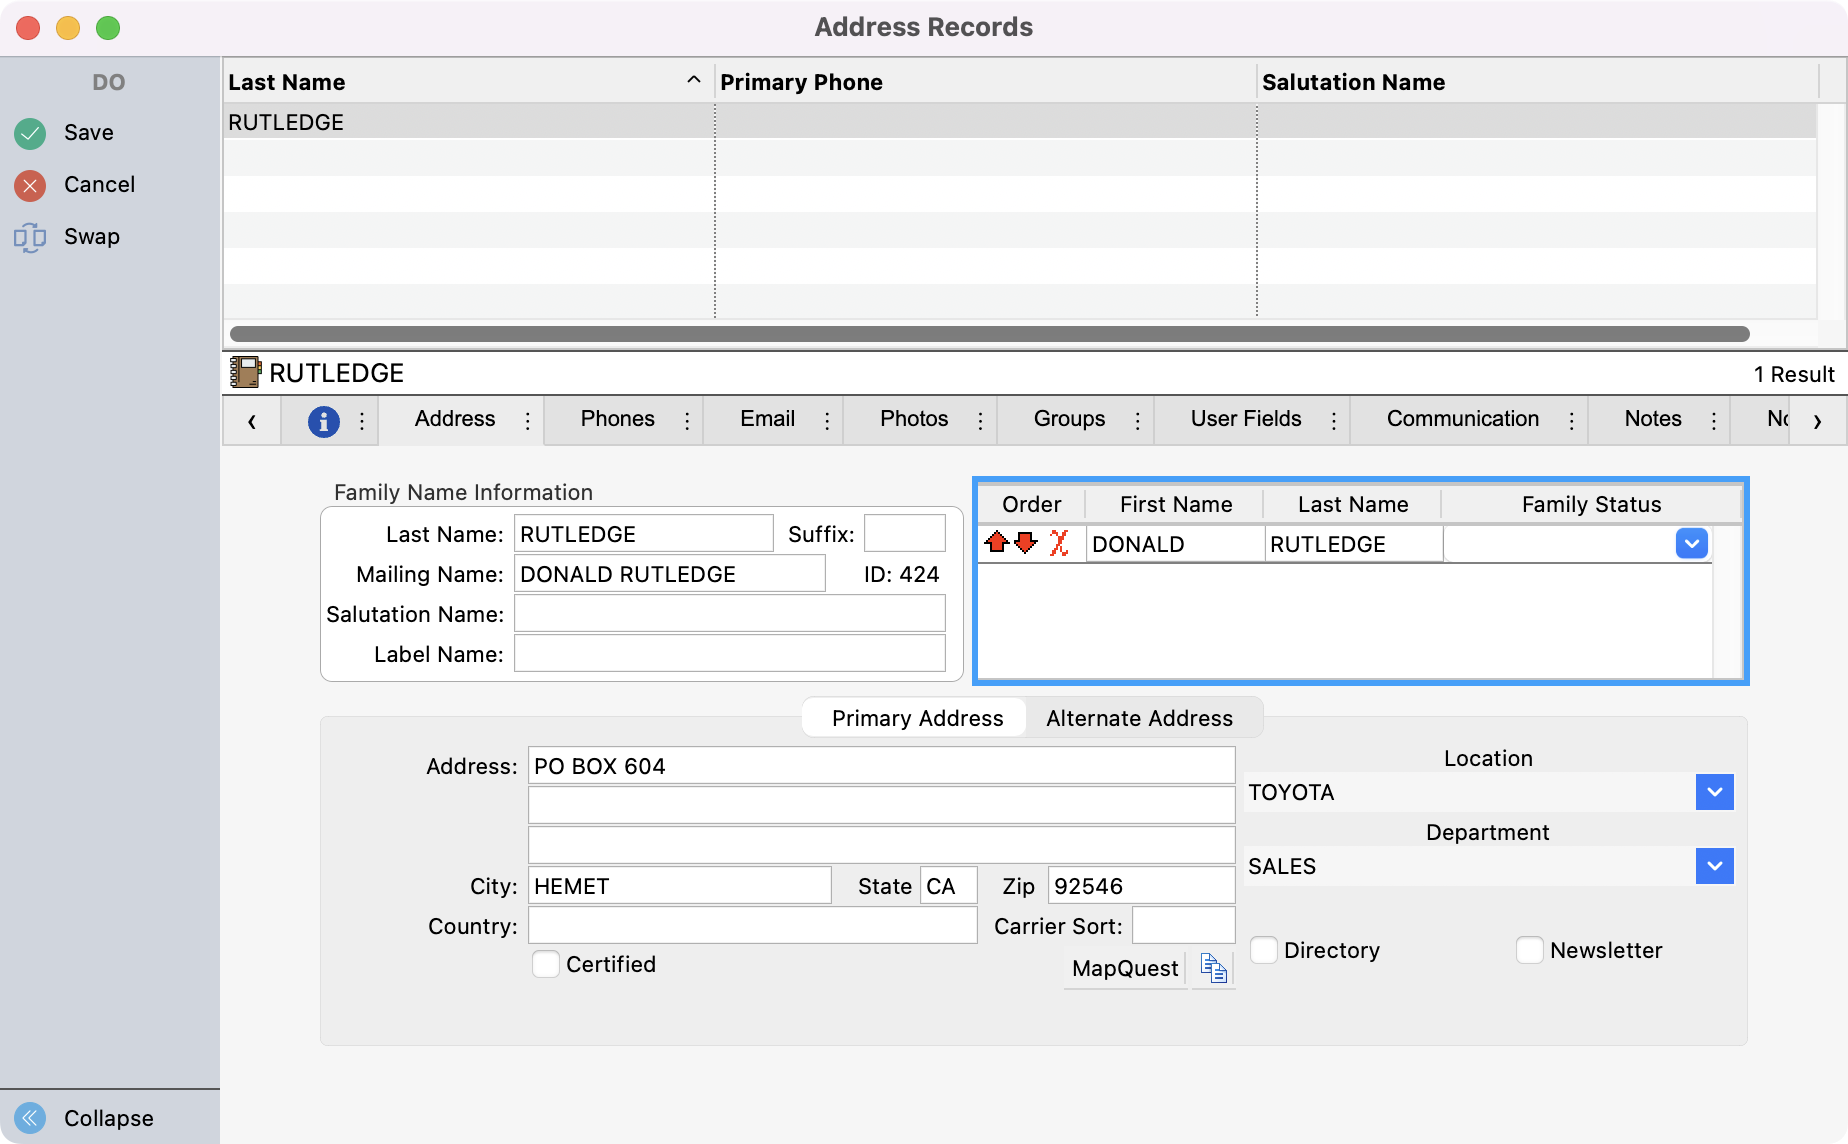
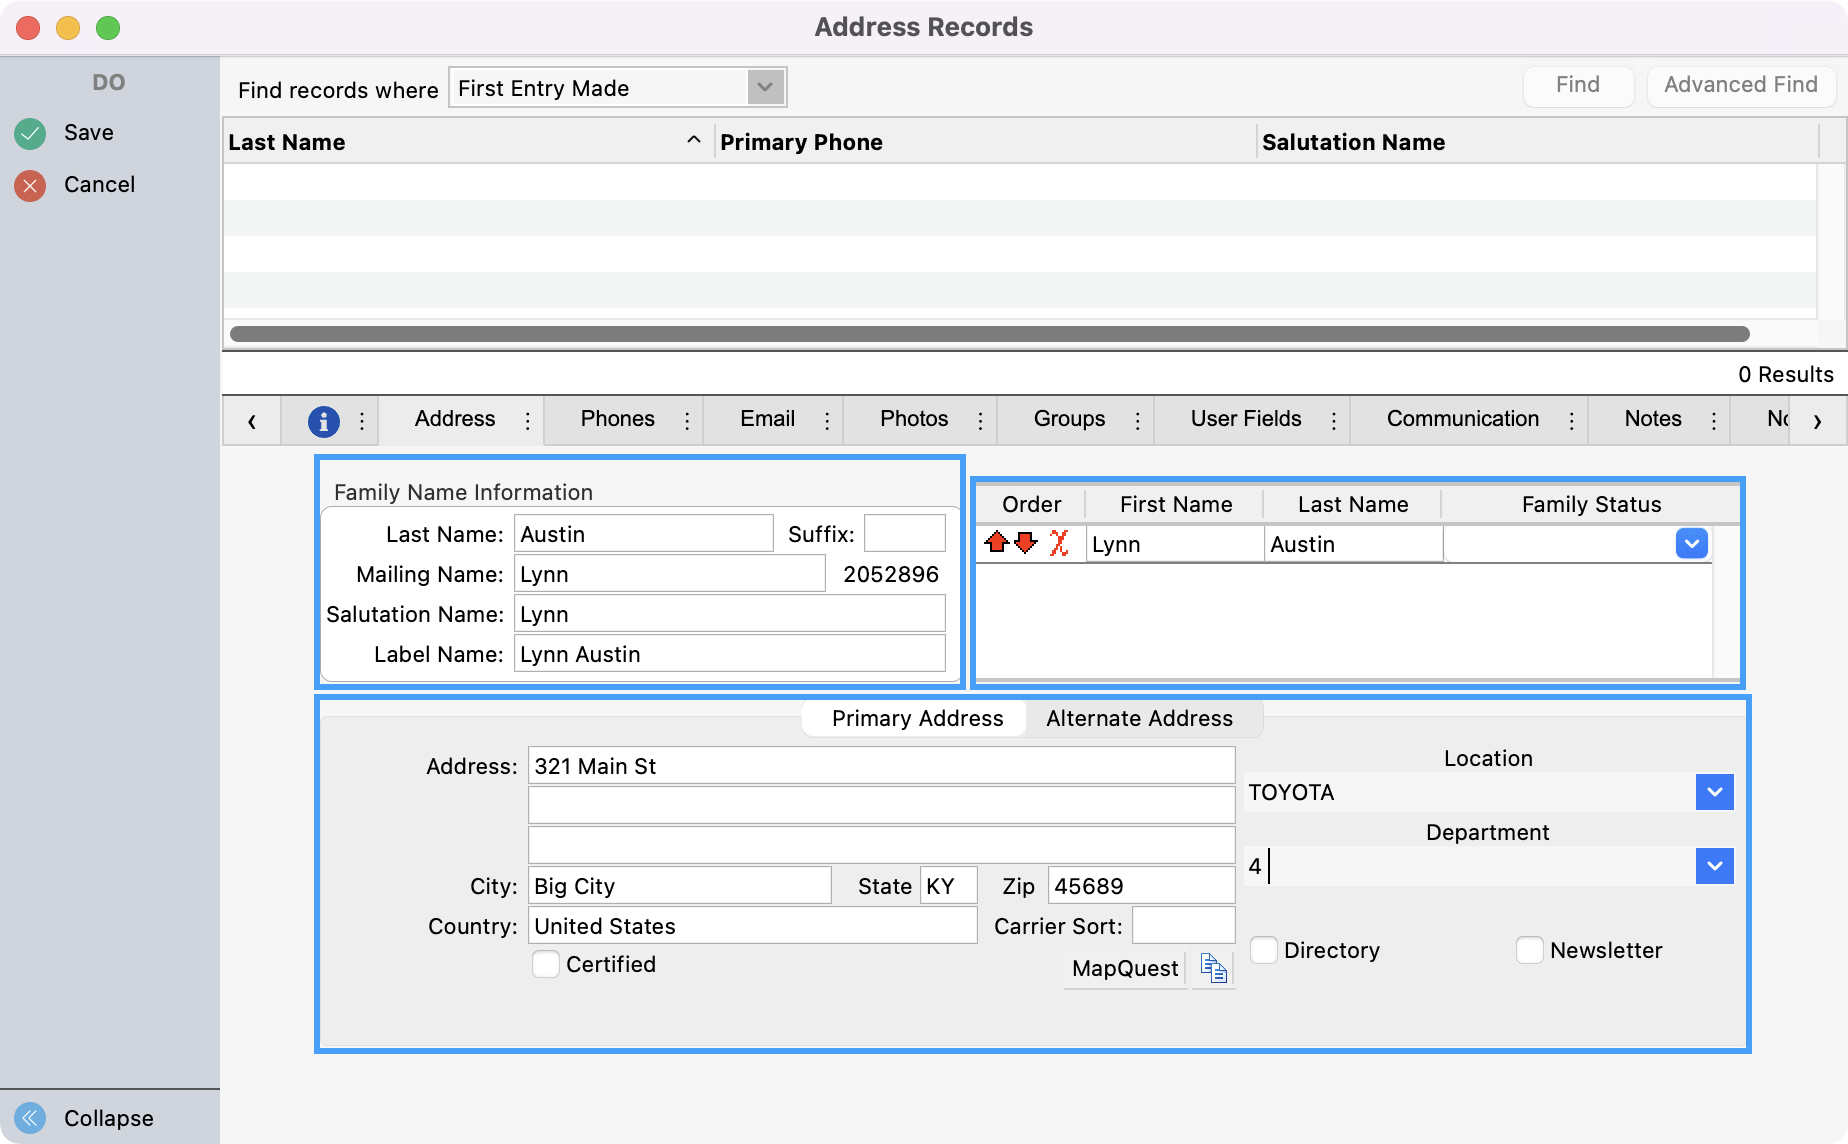
Two things you need to add in change mode are an Individual record and an email address from the employee if they do not already have one. To add an Individual record, enter the employee's First and Last Name in the Family Status box.
-
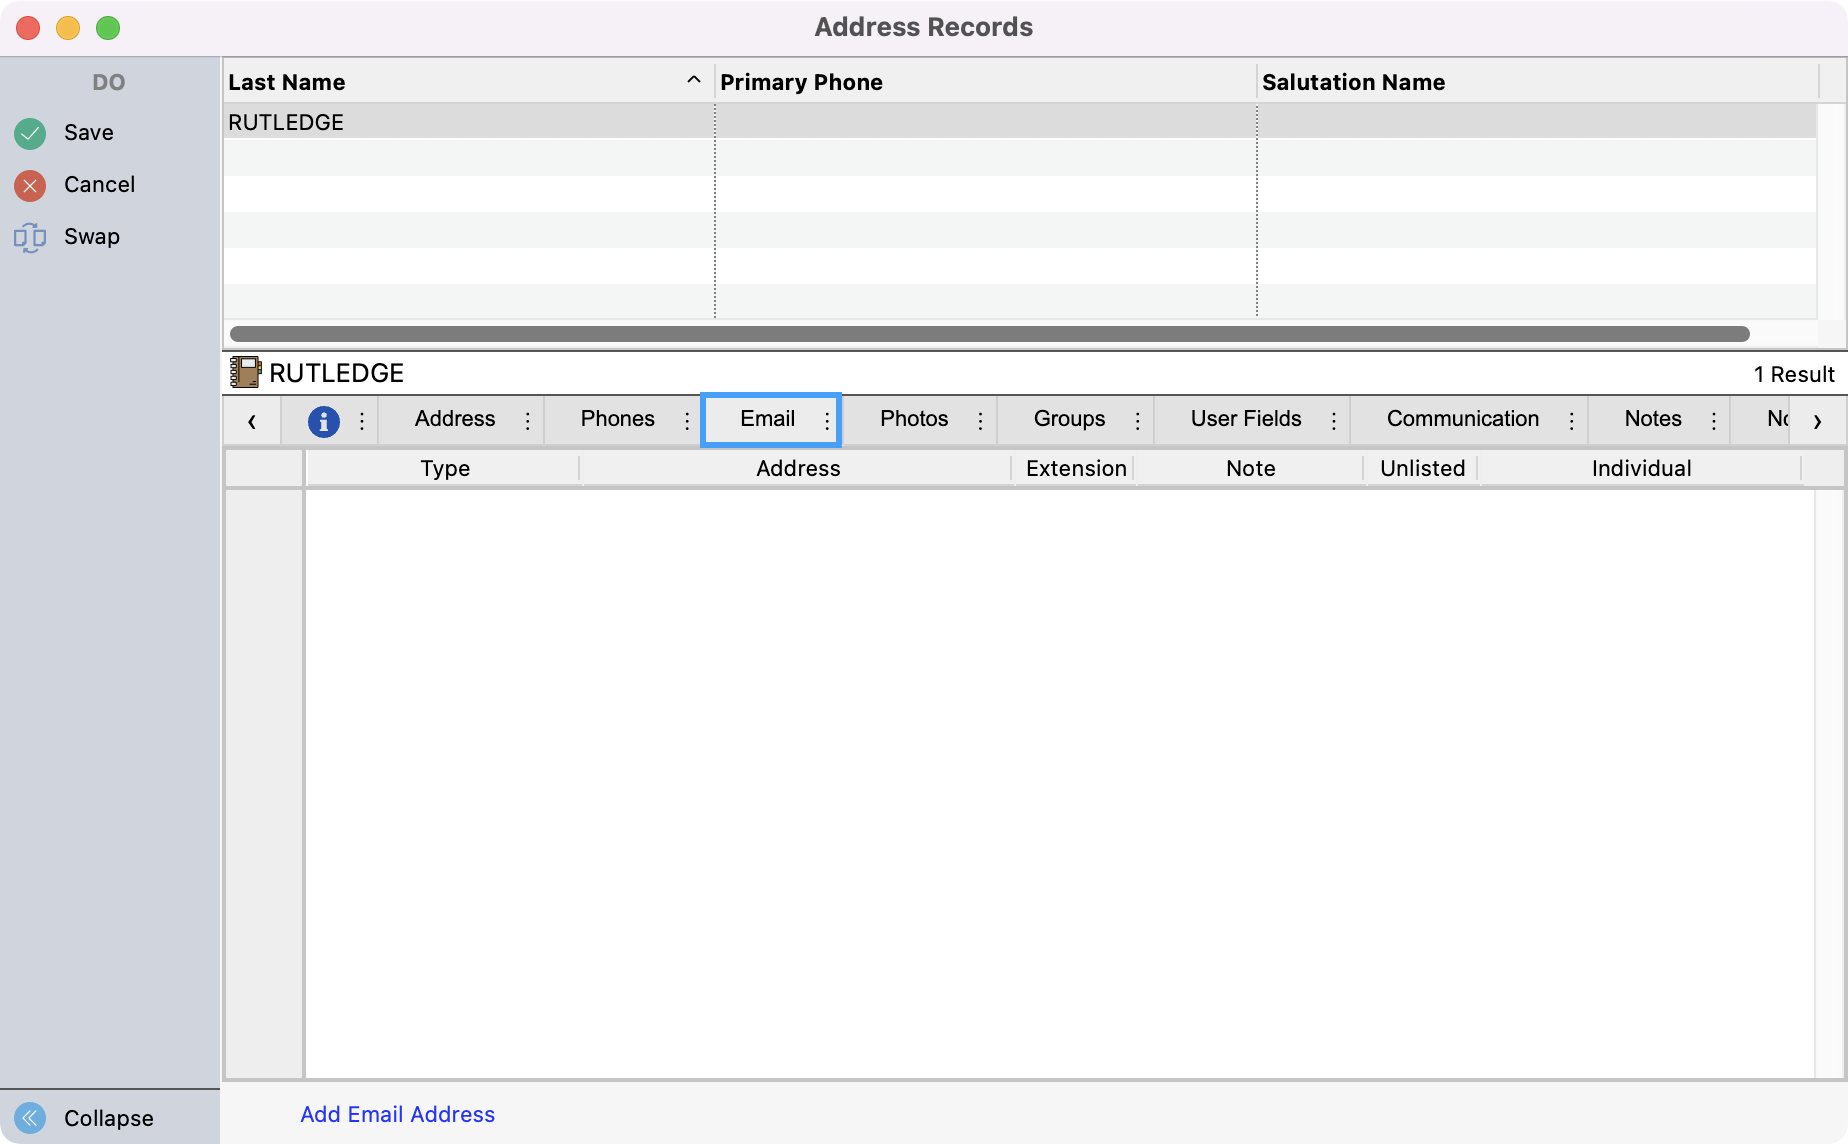
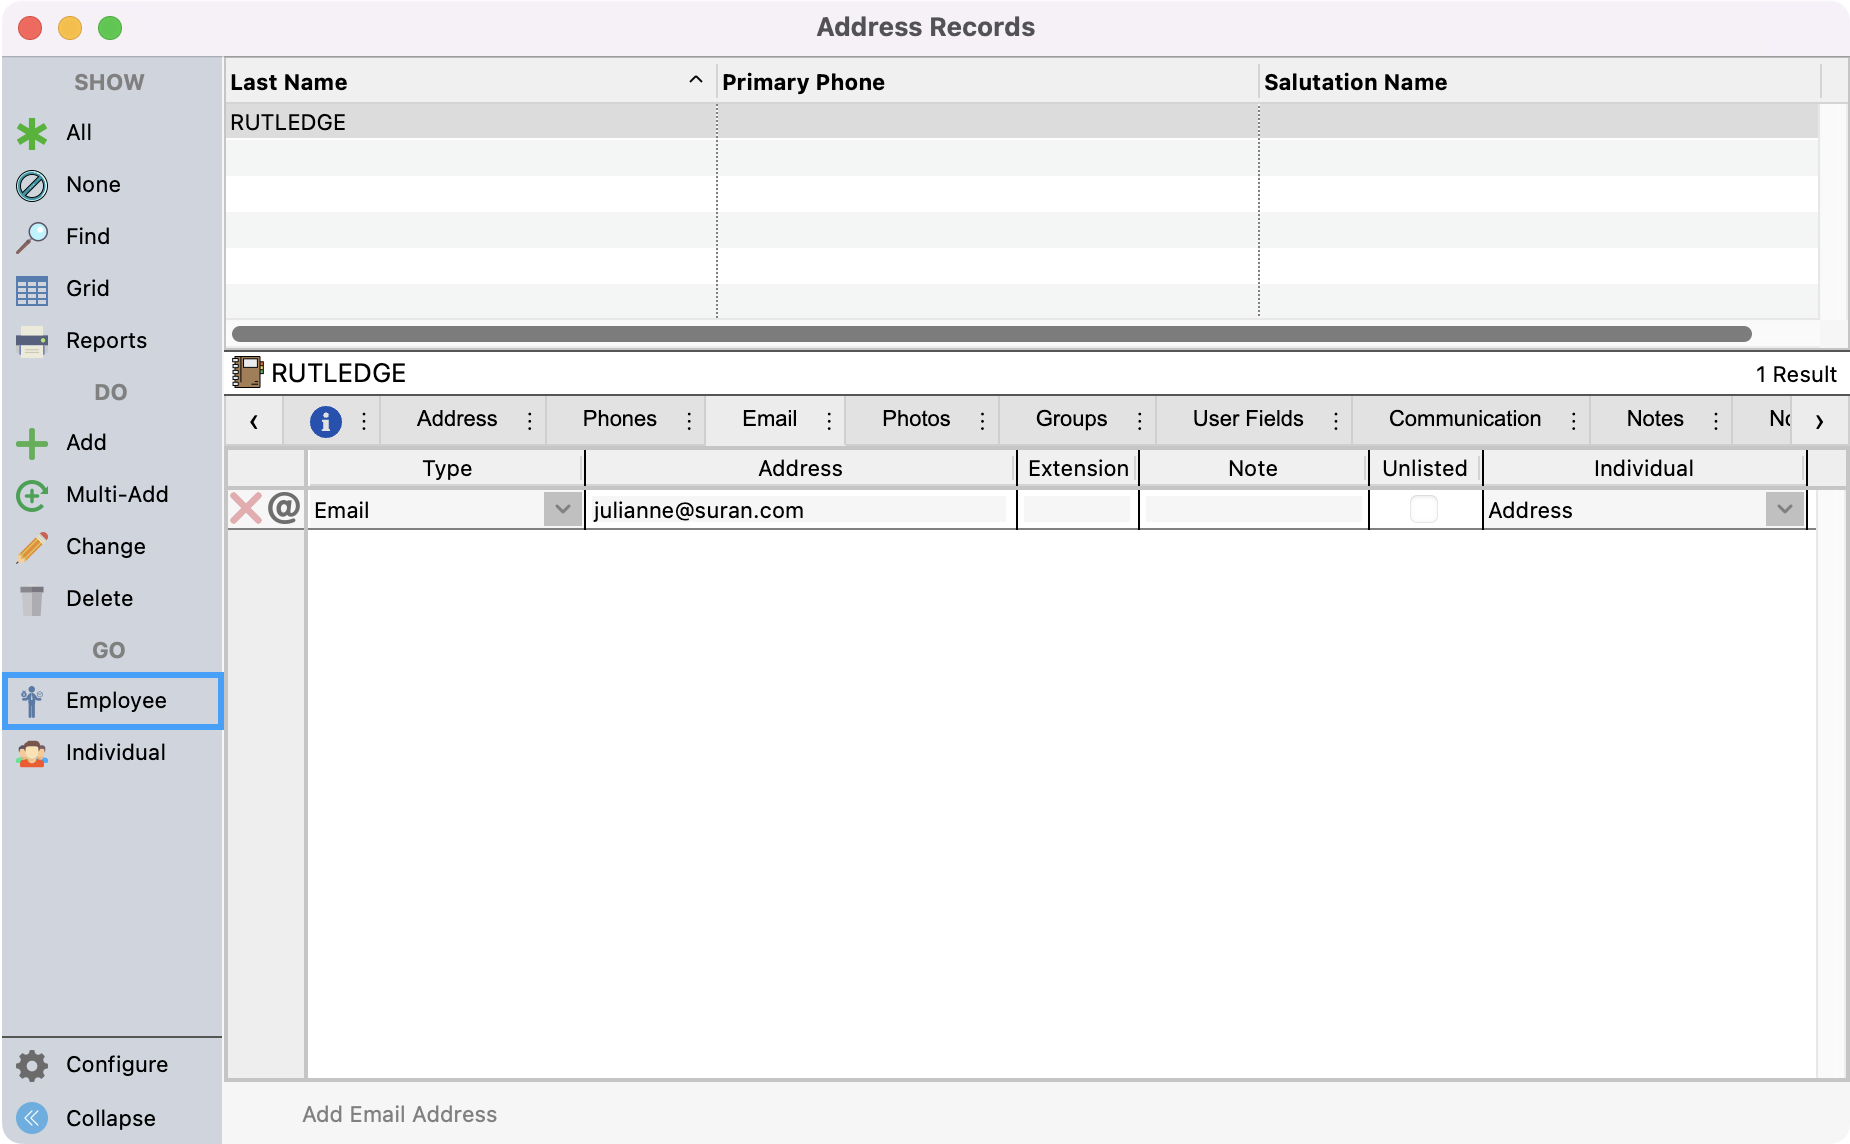
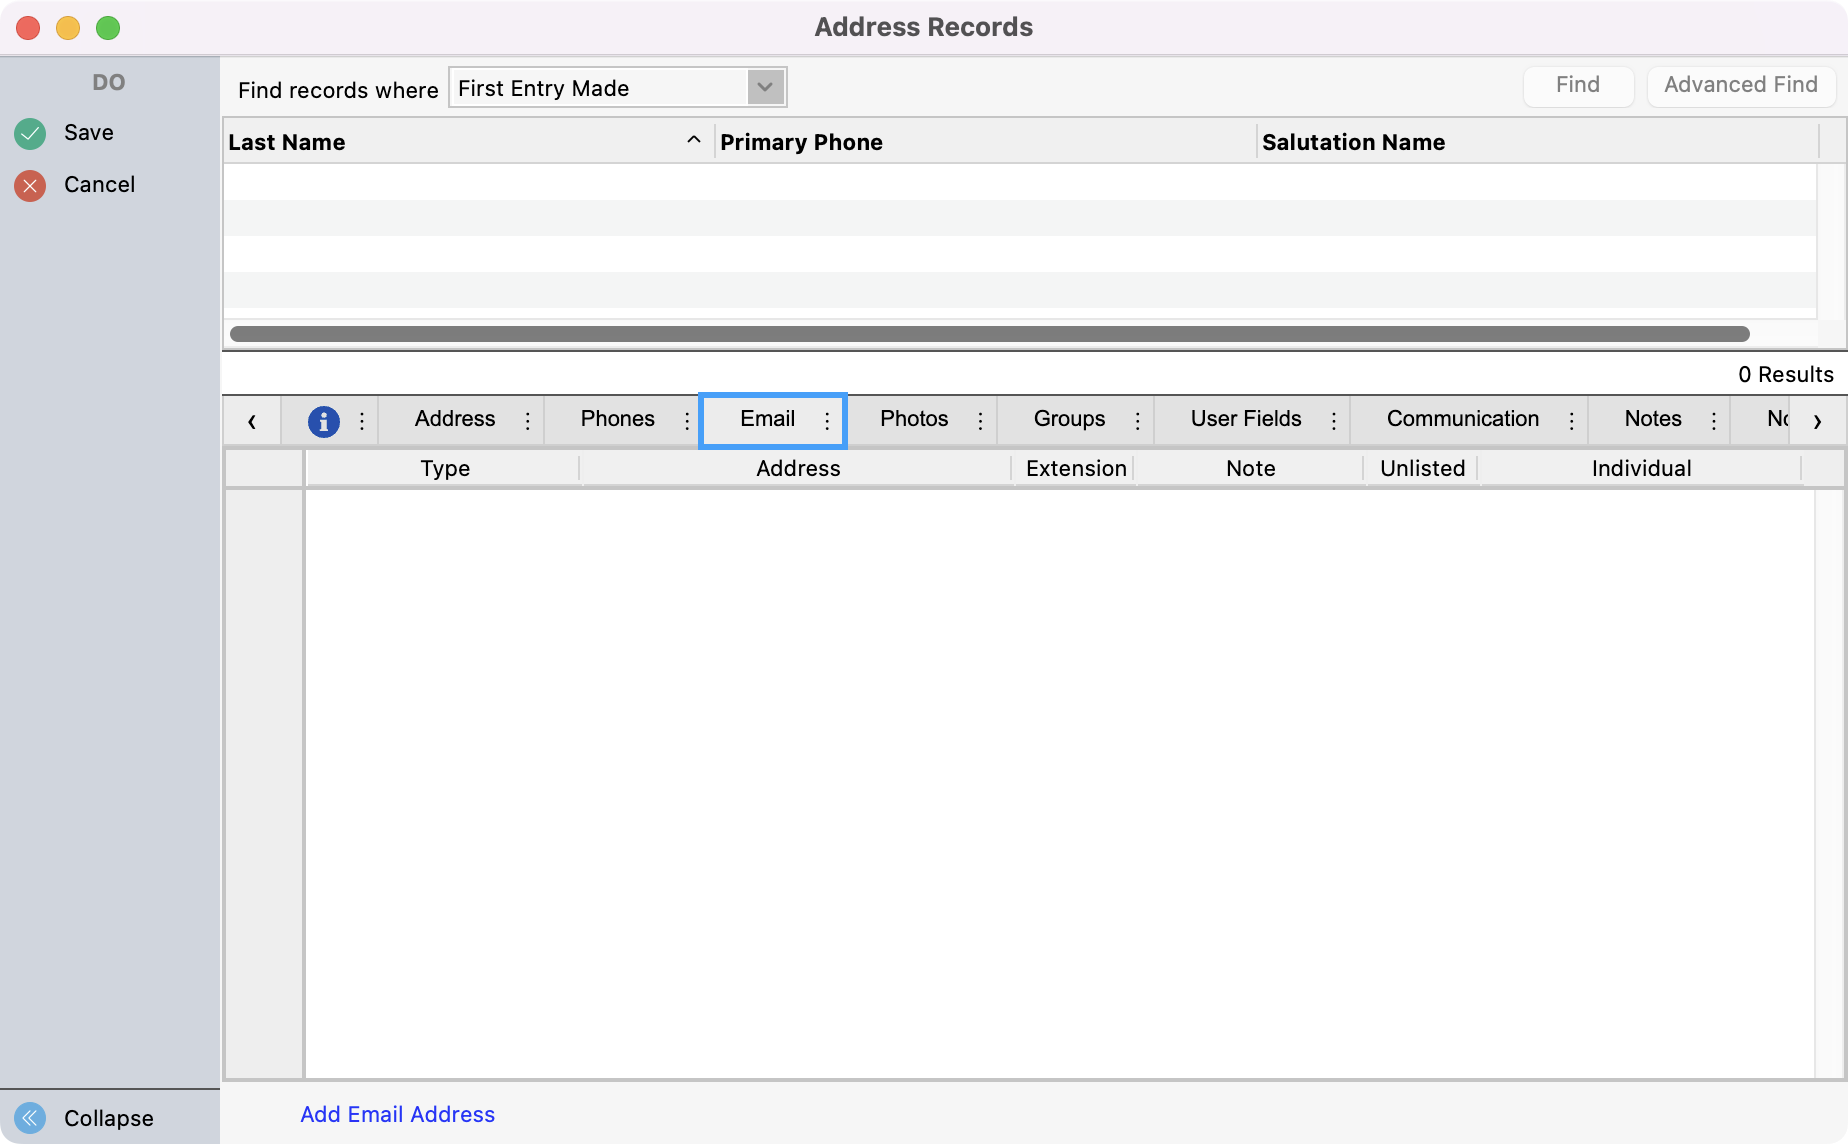
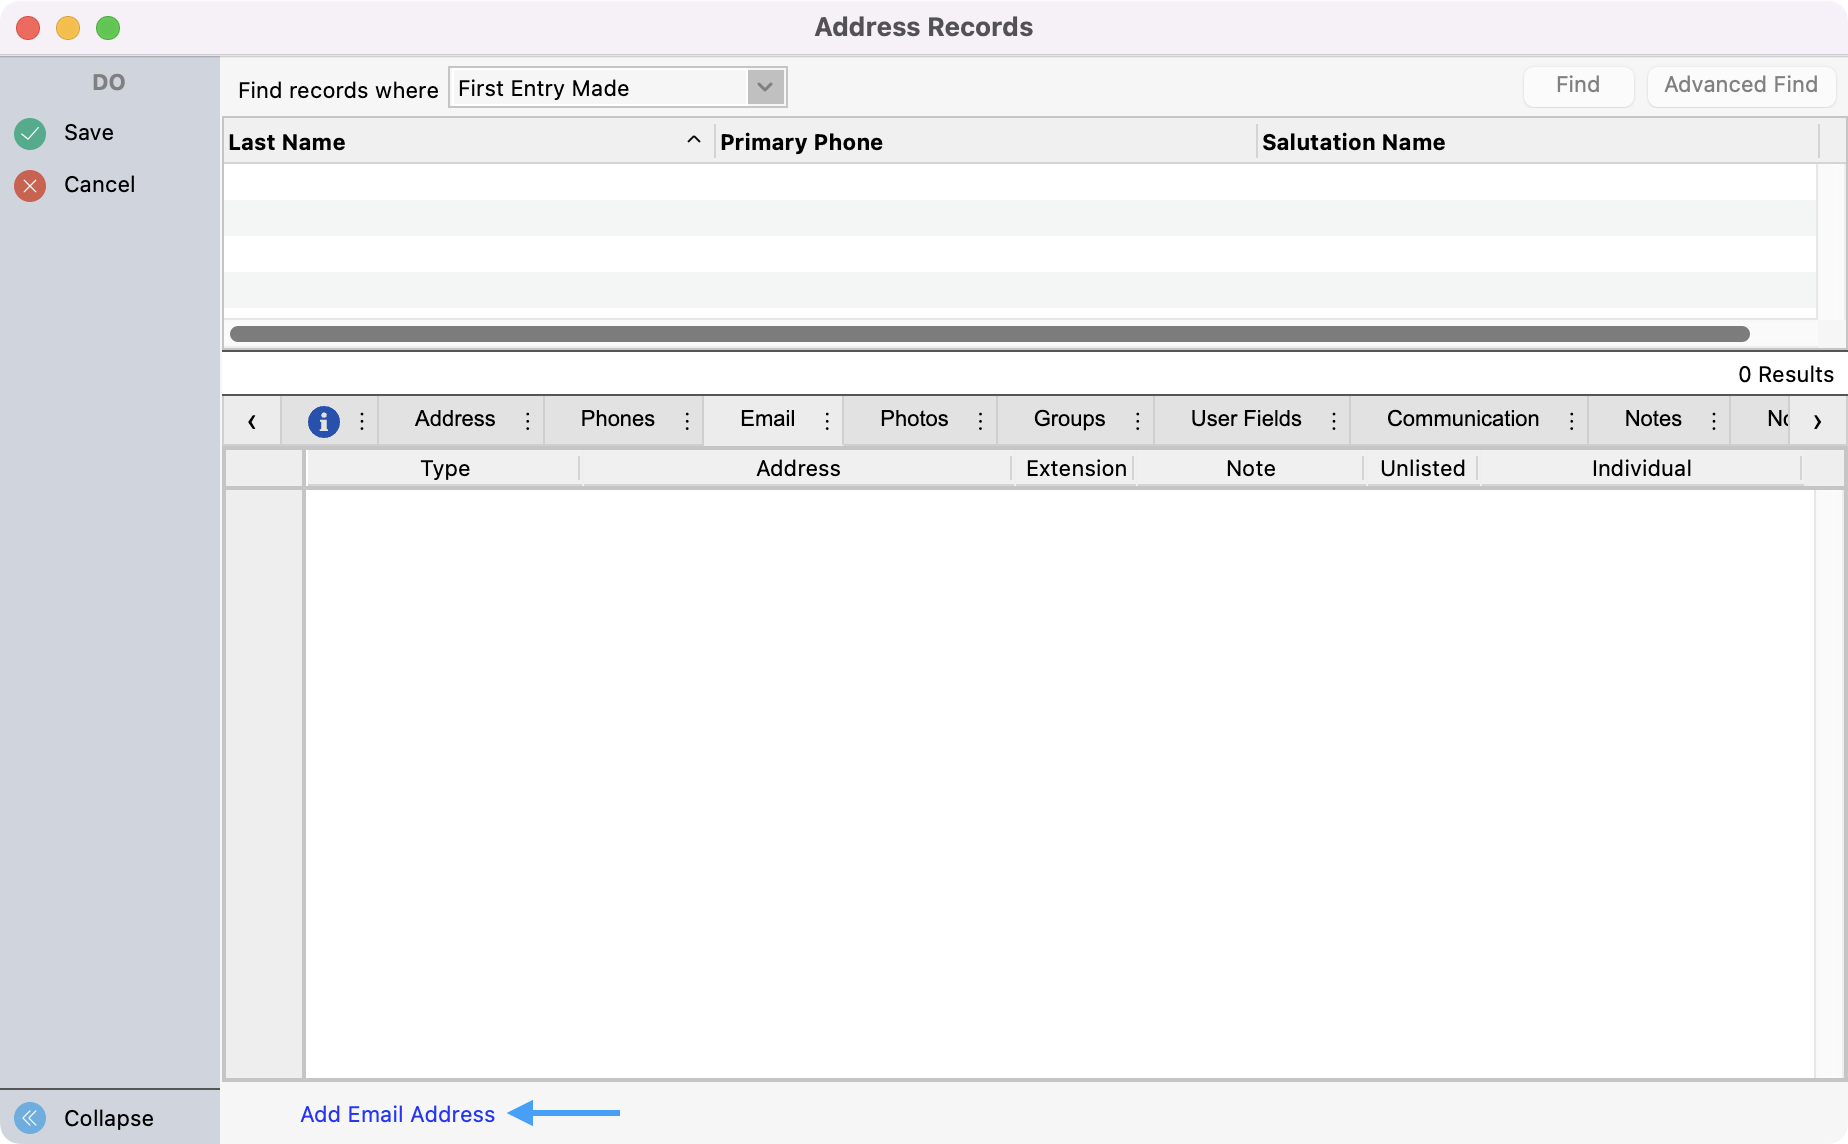
While still in change mode, click on the Email tab.
-
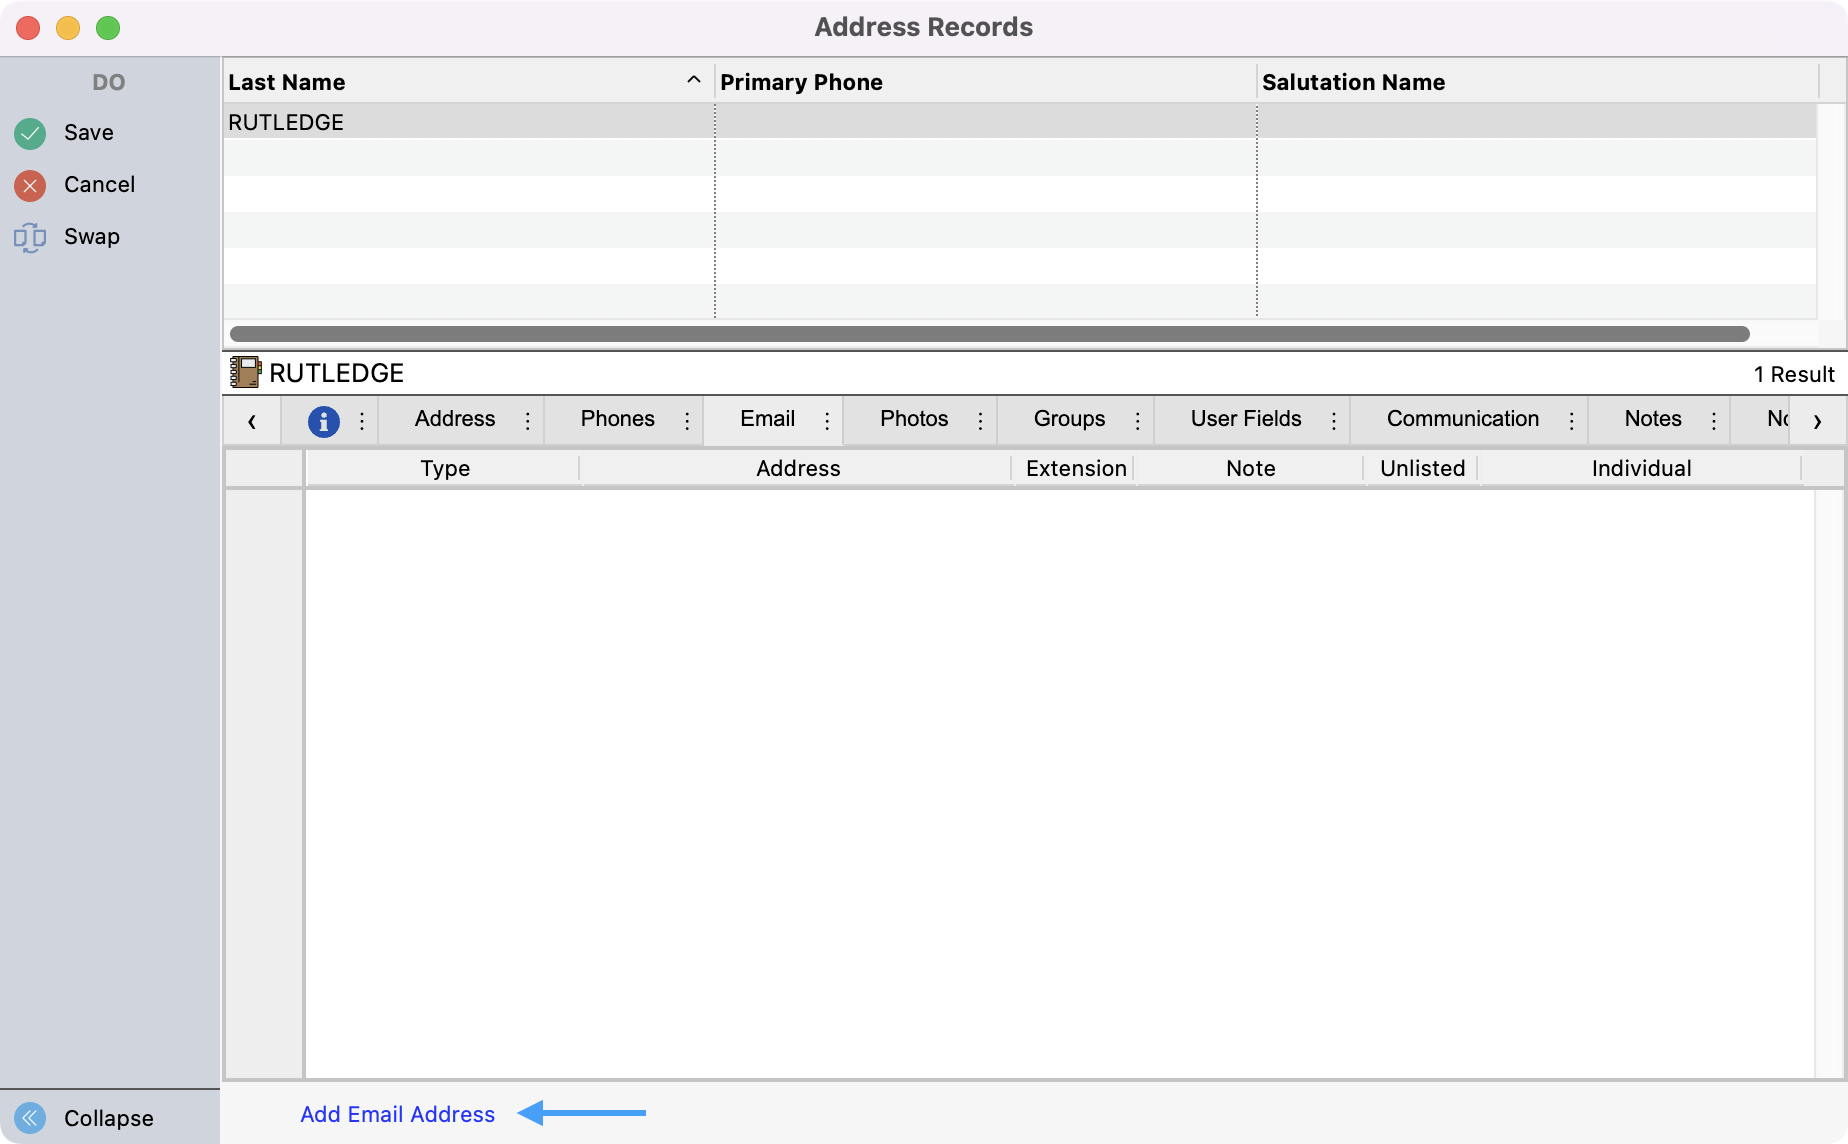
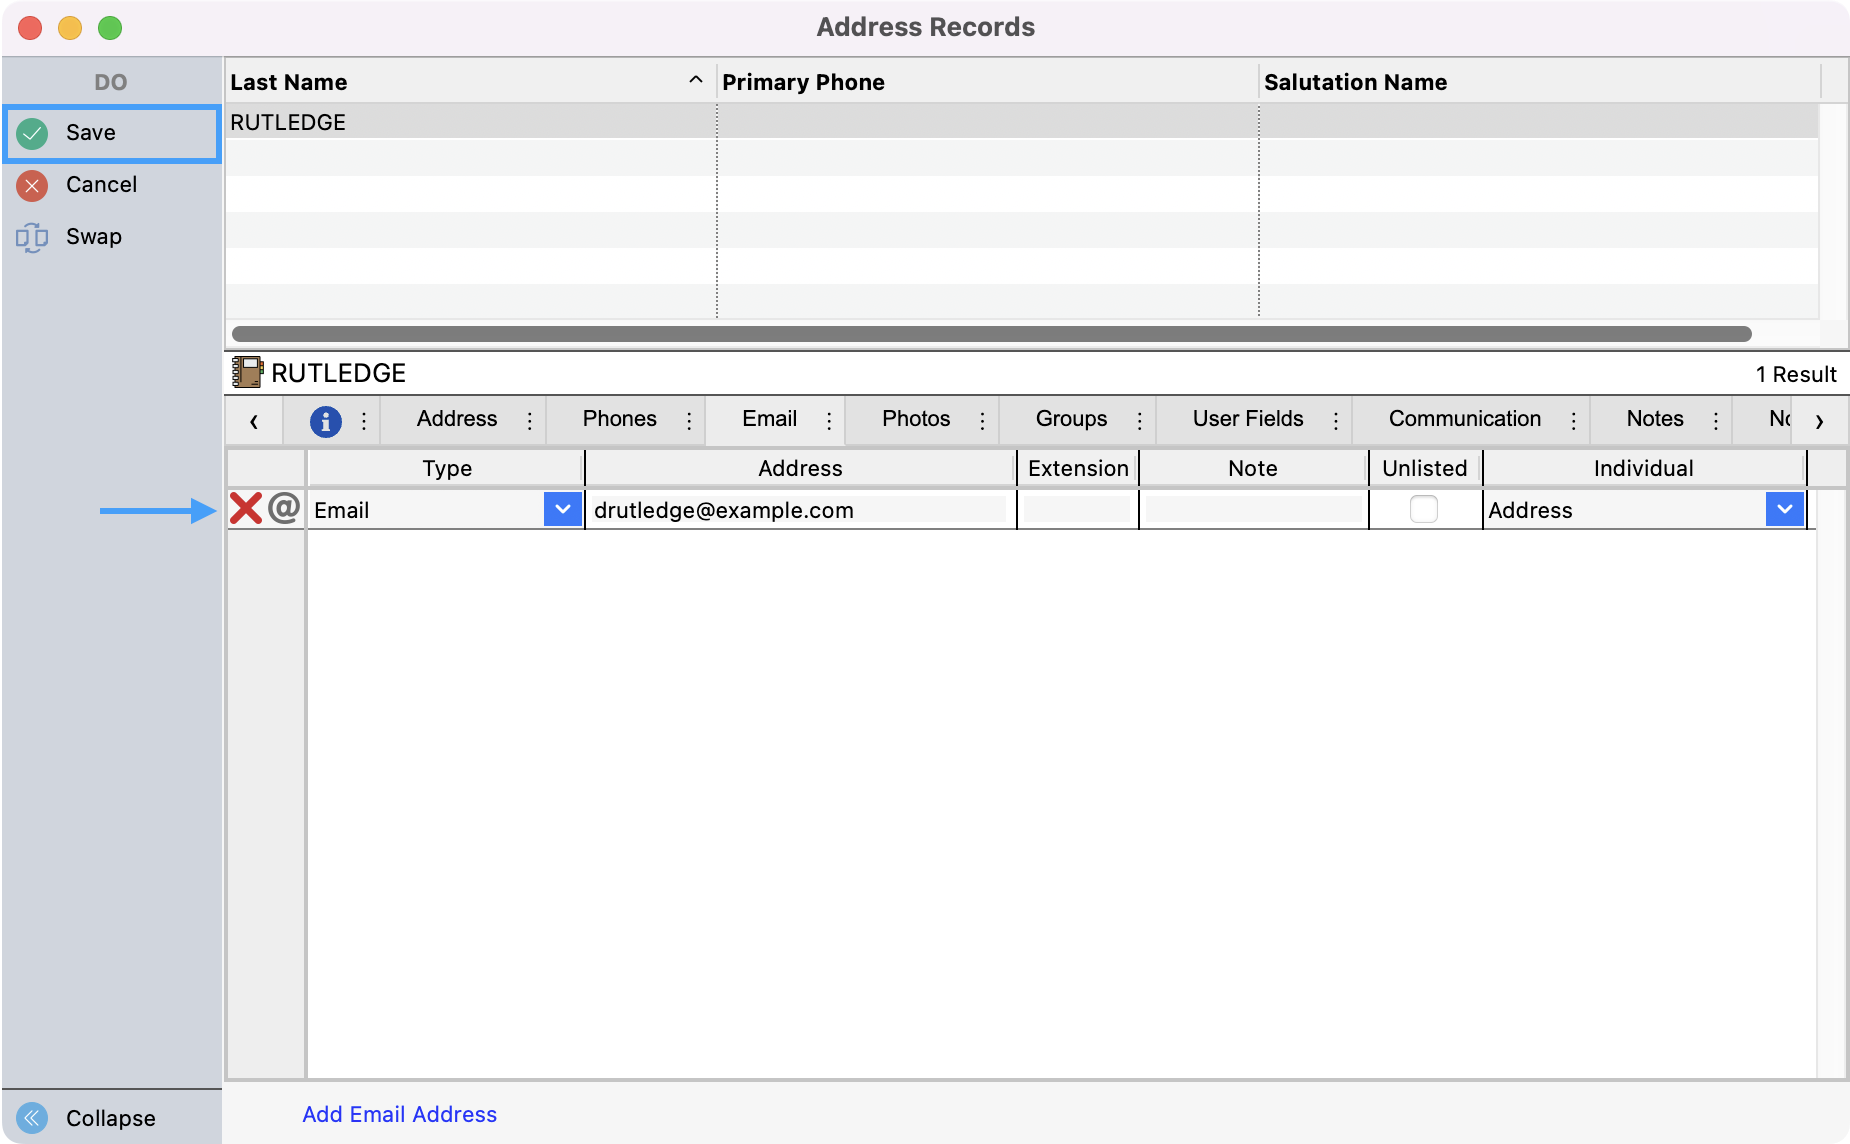
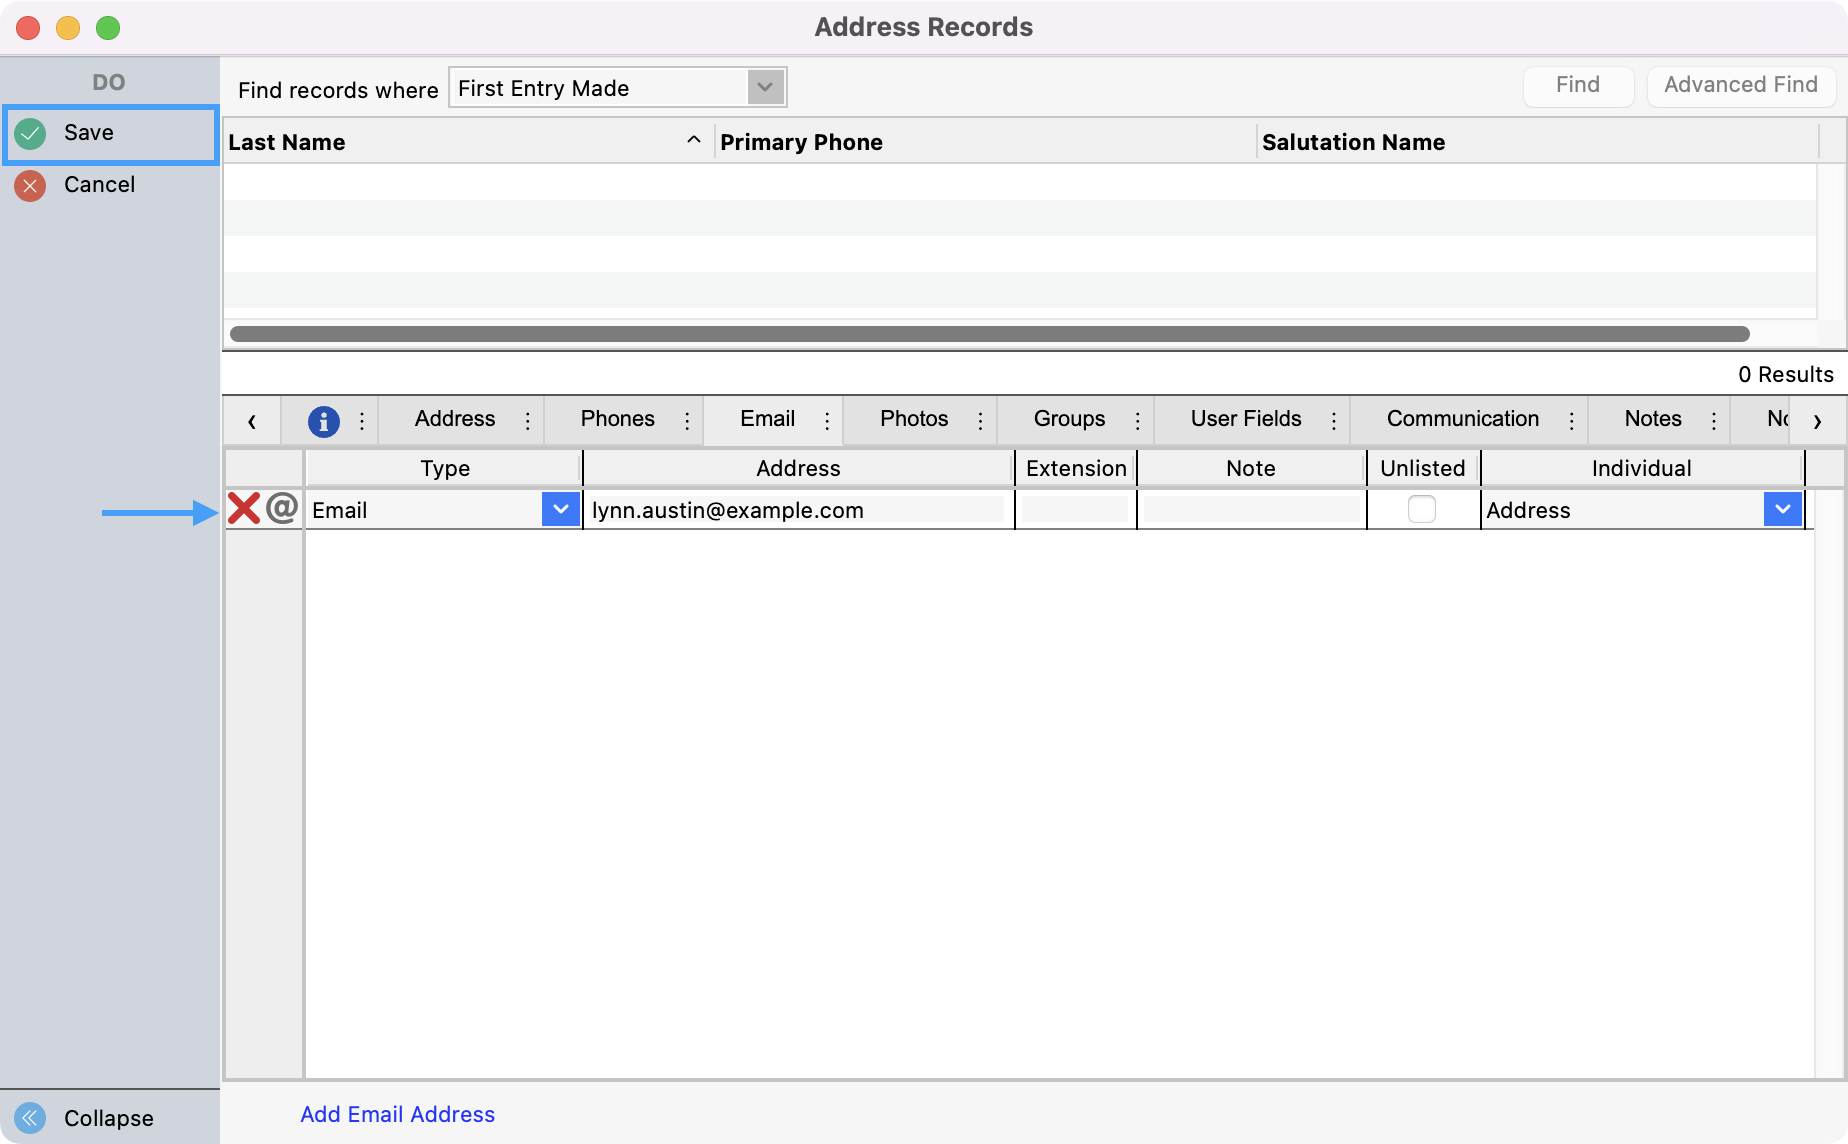
Click Add Email Address at the bottom of the window and then add the email address for the employee. Then, Save your changes in the upper left-hand corner.
-
Next, from the Address record, click Employee from the left sidebar.
-
On the Employee Record window, click Change from the left sidebar.
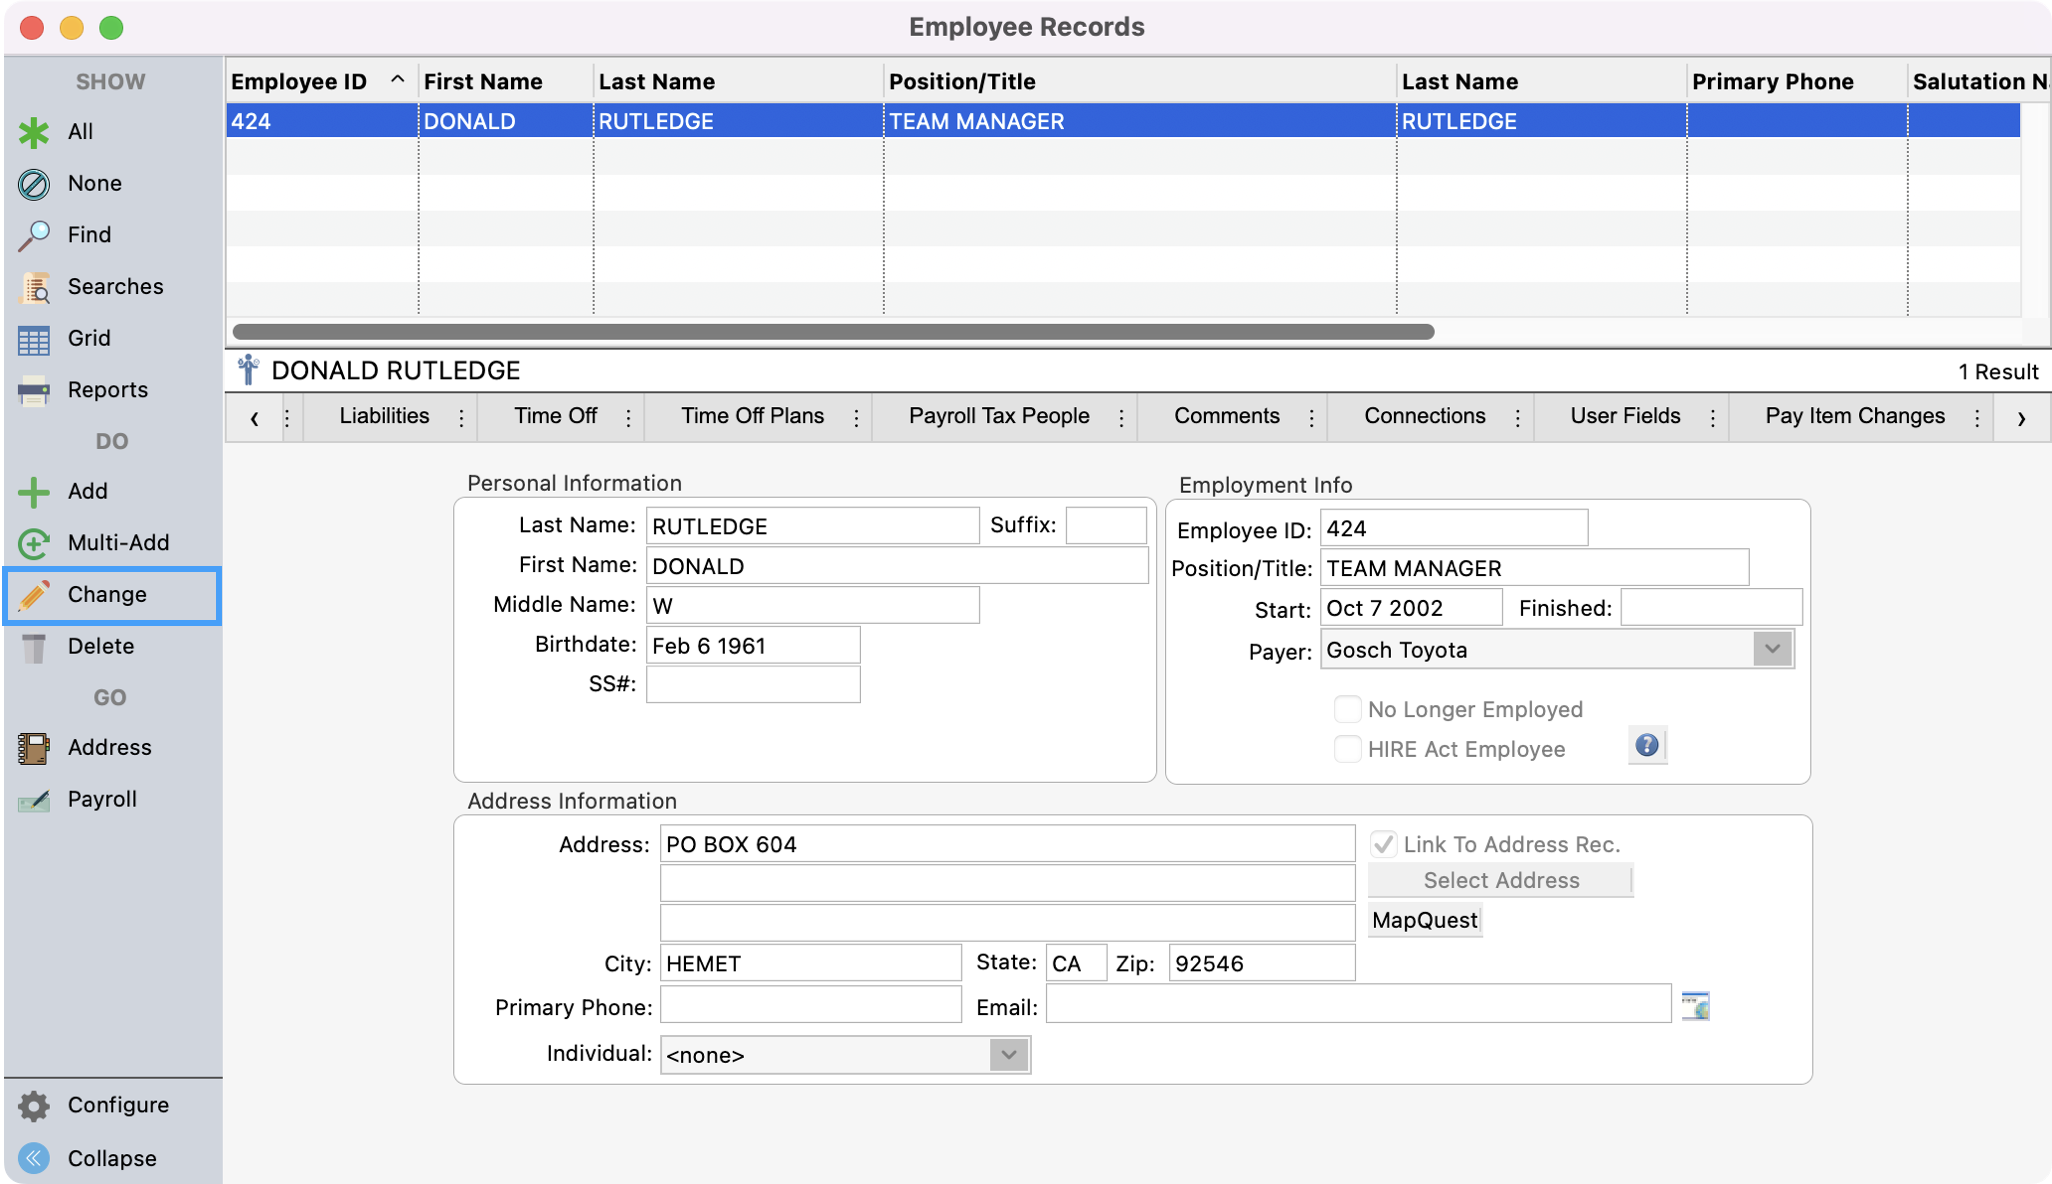
-
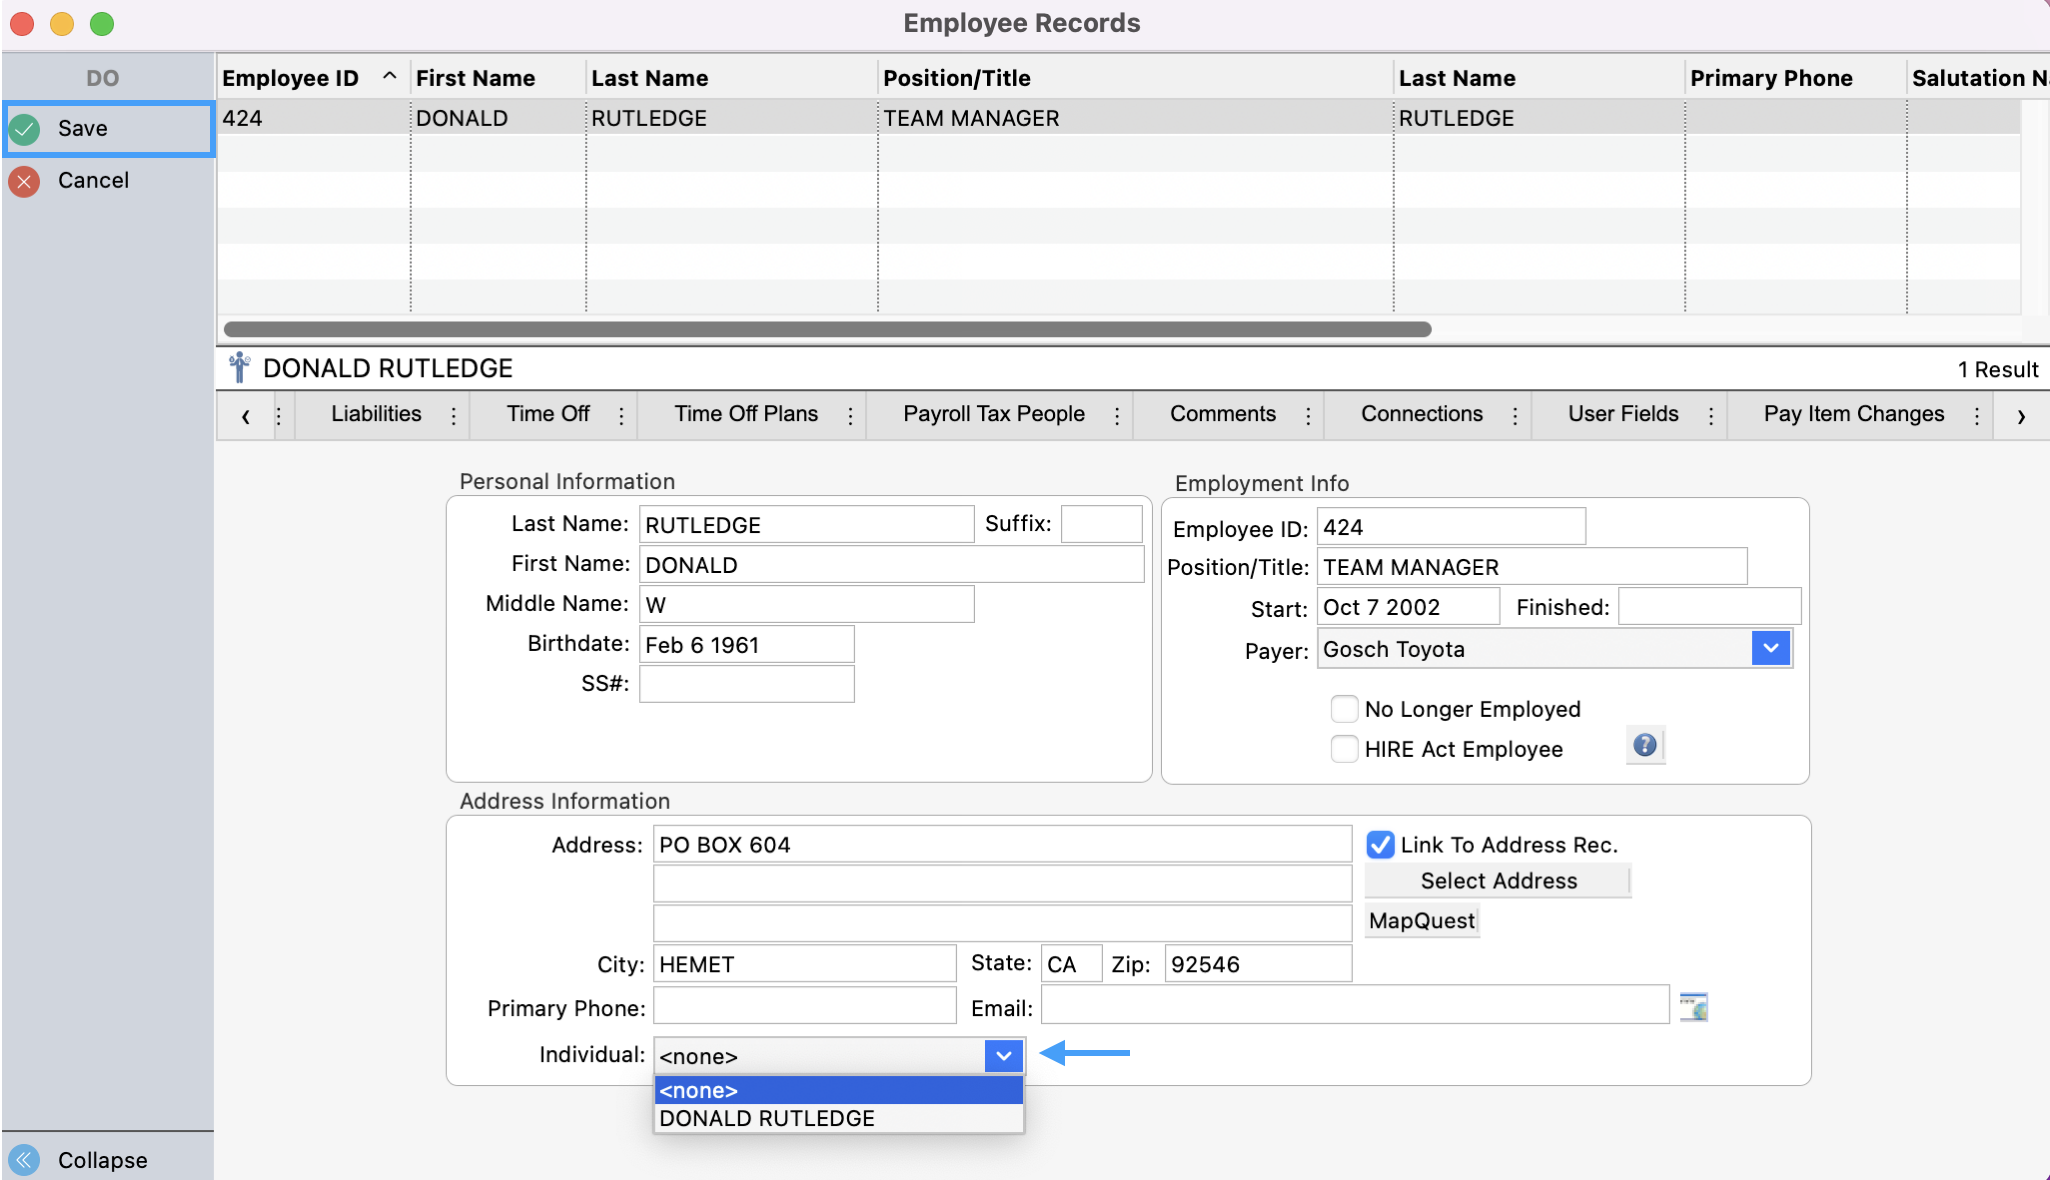
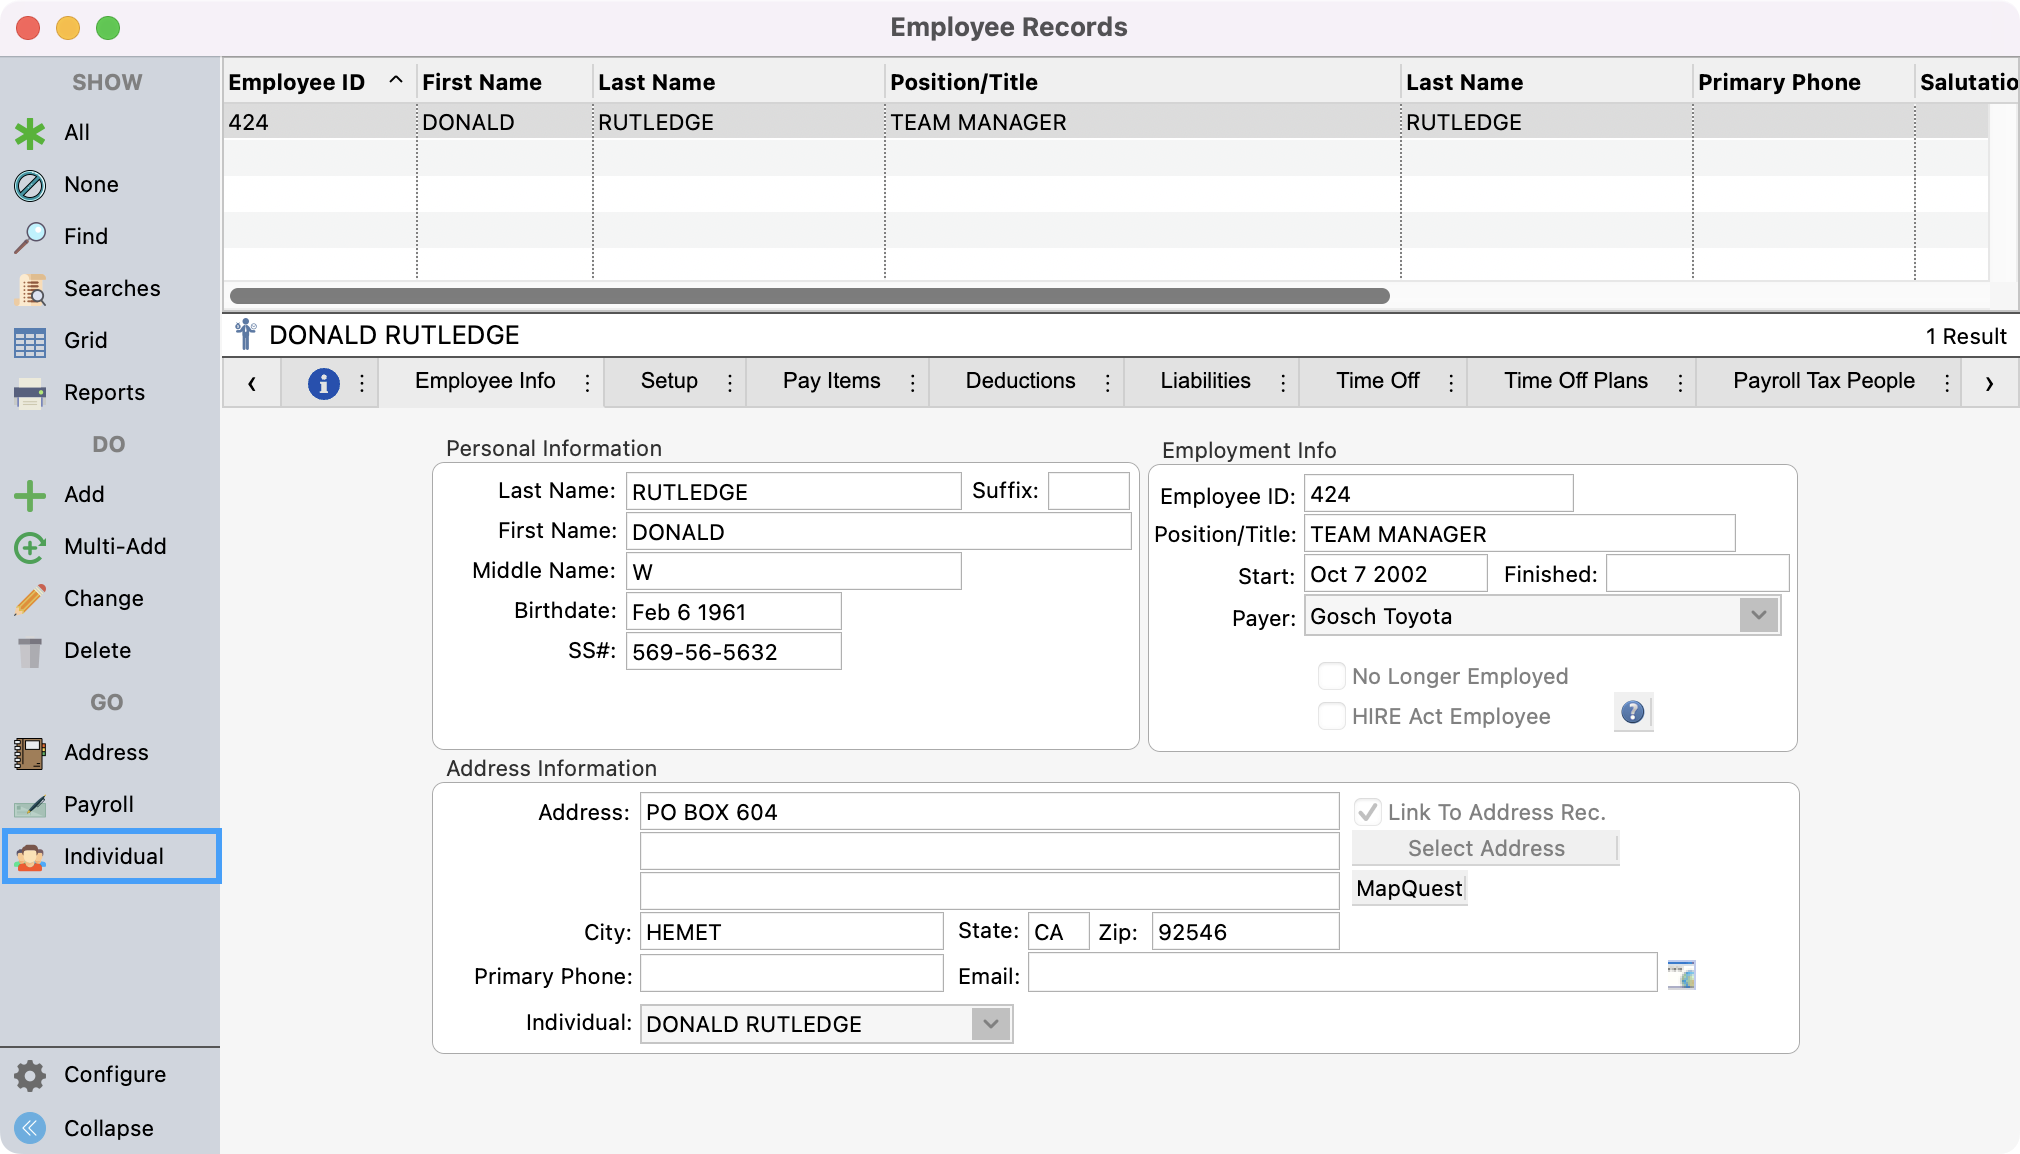
Under the Address Information box, use the drop-down field under Individual to assign the right Individual to this Employee record. Save your changes in the upper left-hand side.
-
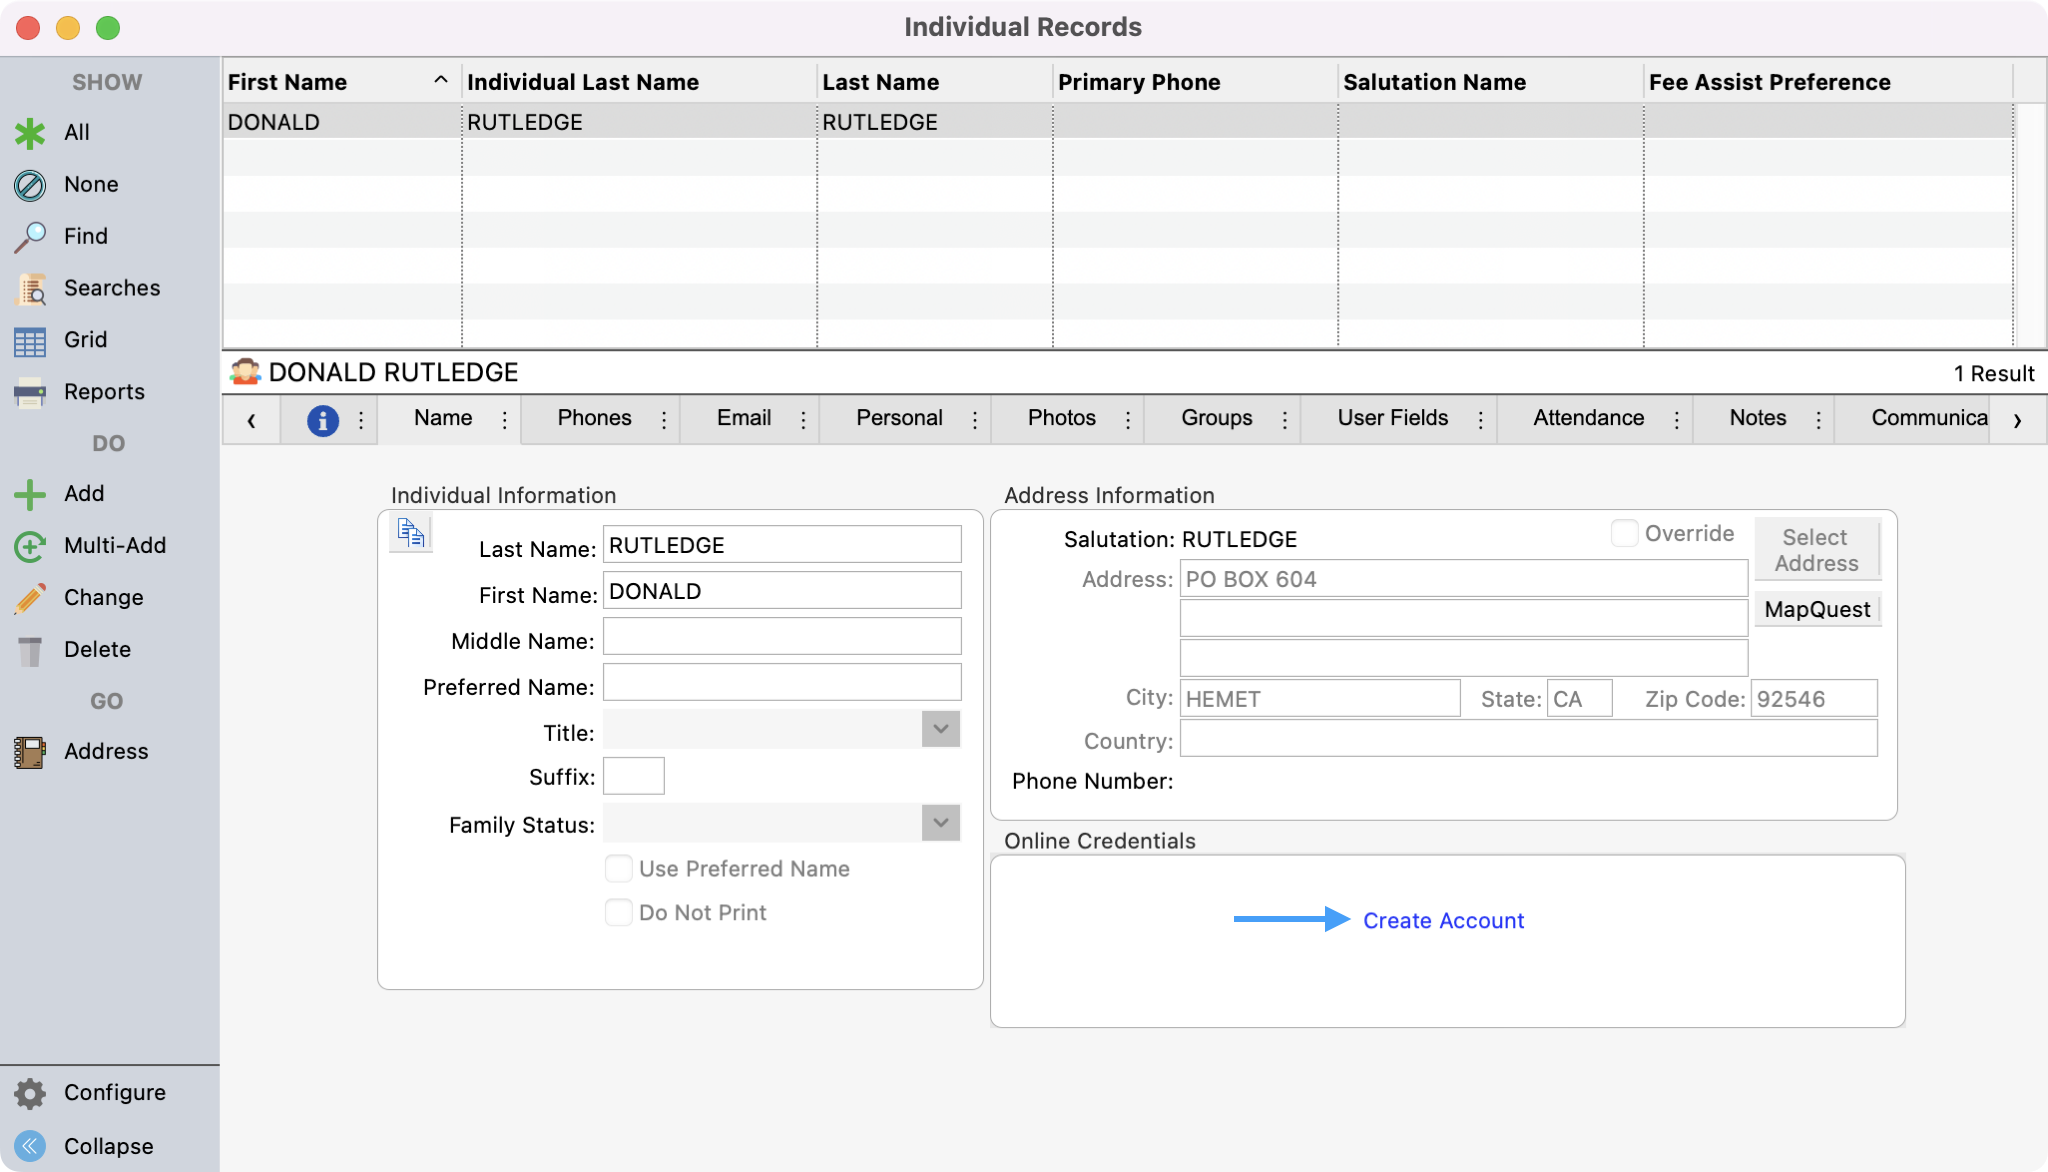
Next, click Individual from the left sidebar.
-
On the Individual record window, click Create Account in the Online Credentials box.
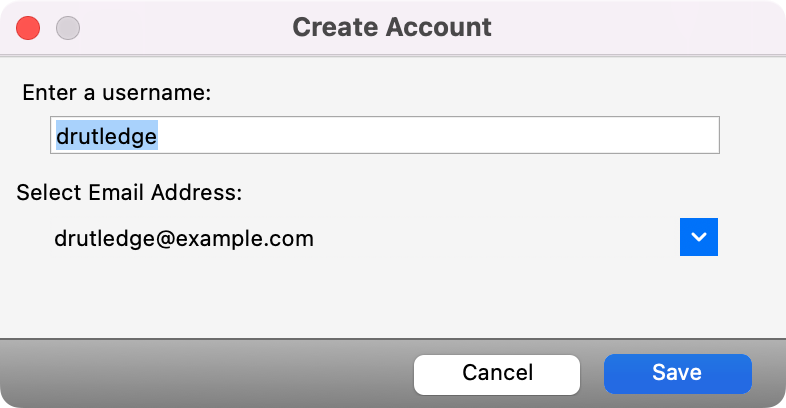
-
You’ll see a pop-up where you can use the default username or edit it. You will also see the email address that will be associated with this account. Click Save.
-
After you click Save, the employee will see a password reset email for them to create their password. They can create their password by clicking on, Click Here.
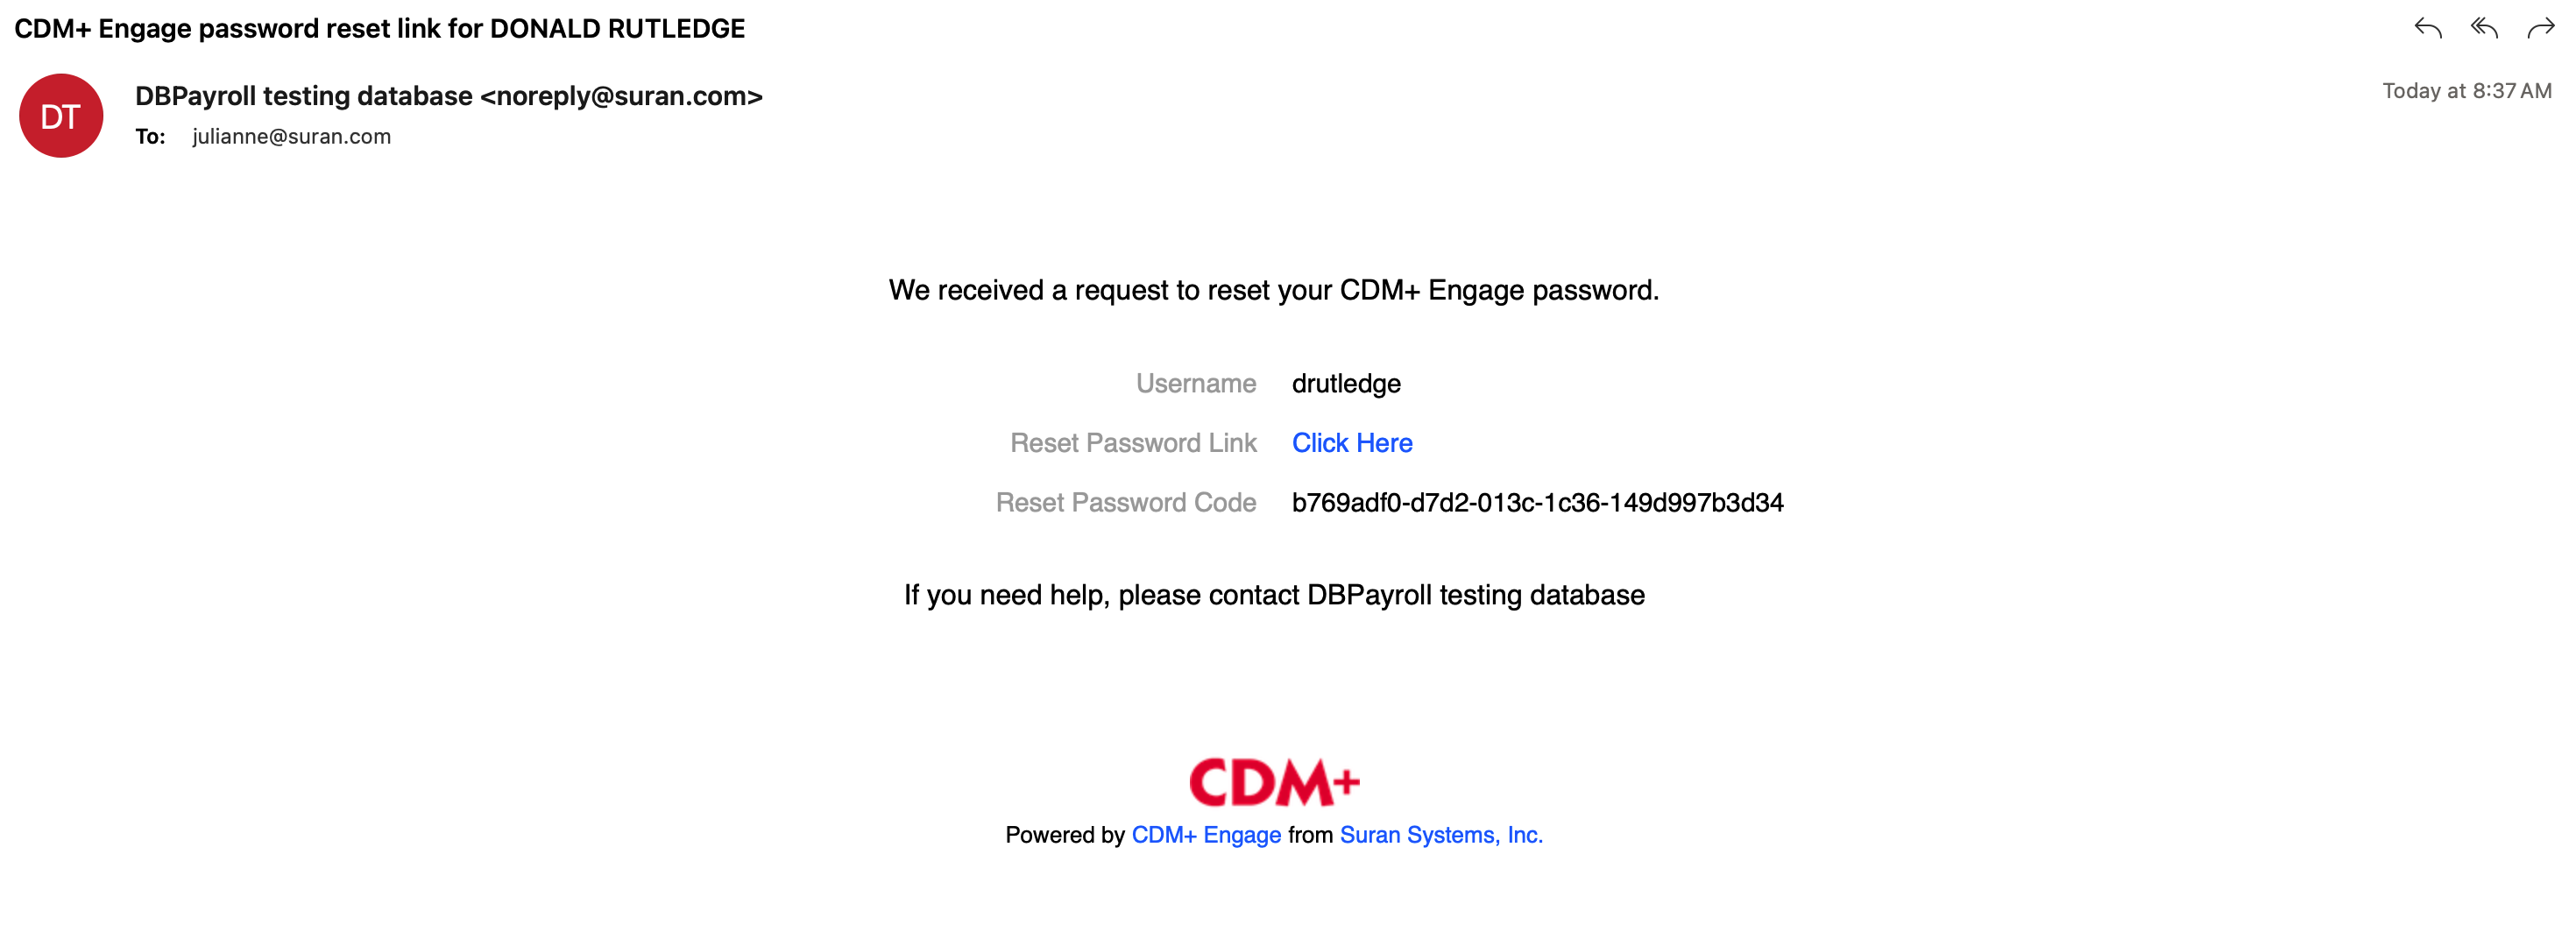
-
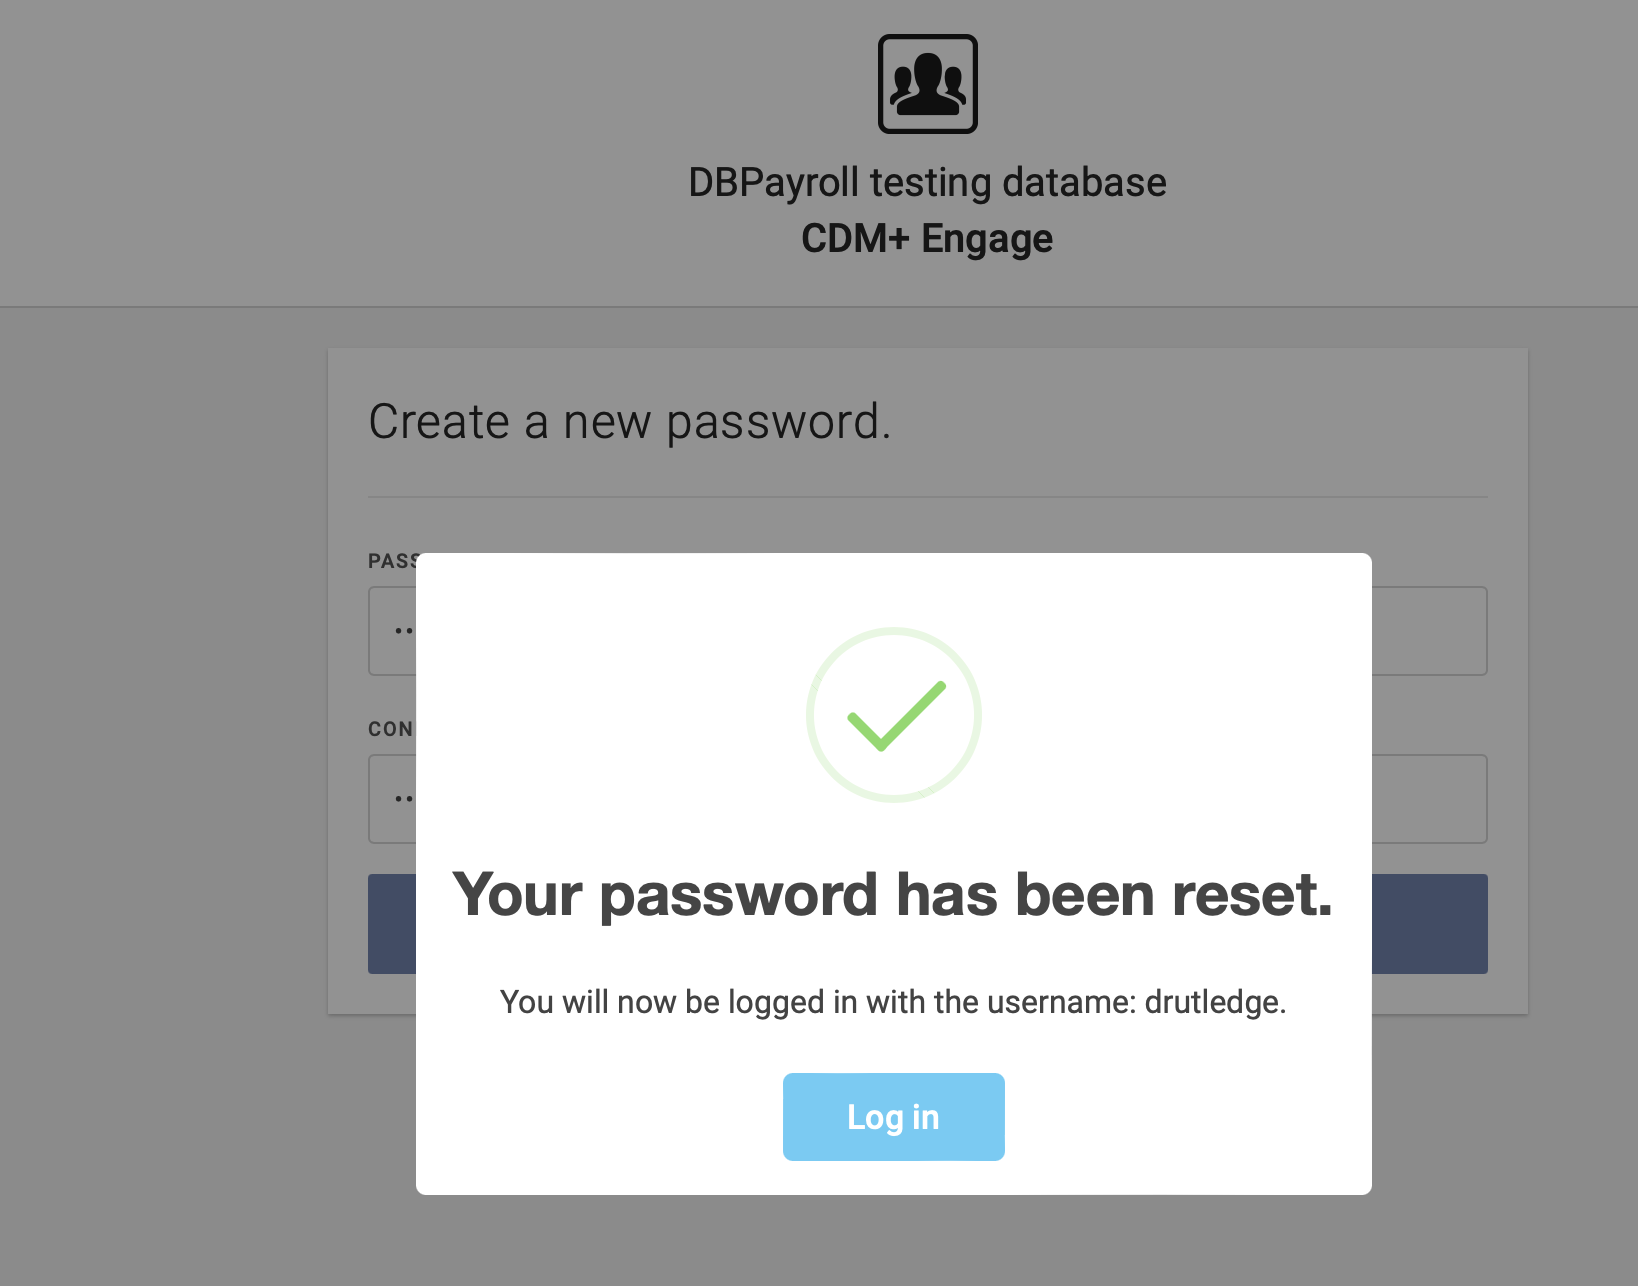
Once they click on the link, they’ll be able to create their password and then log in.
-
Once the employee logs in, they can click Payroll from the top menu. They will be able to navigate to the Payroll or YTD Payroll menu.
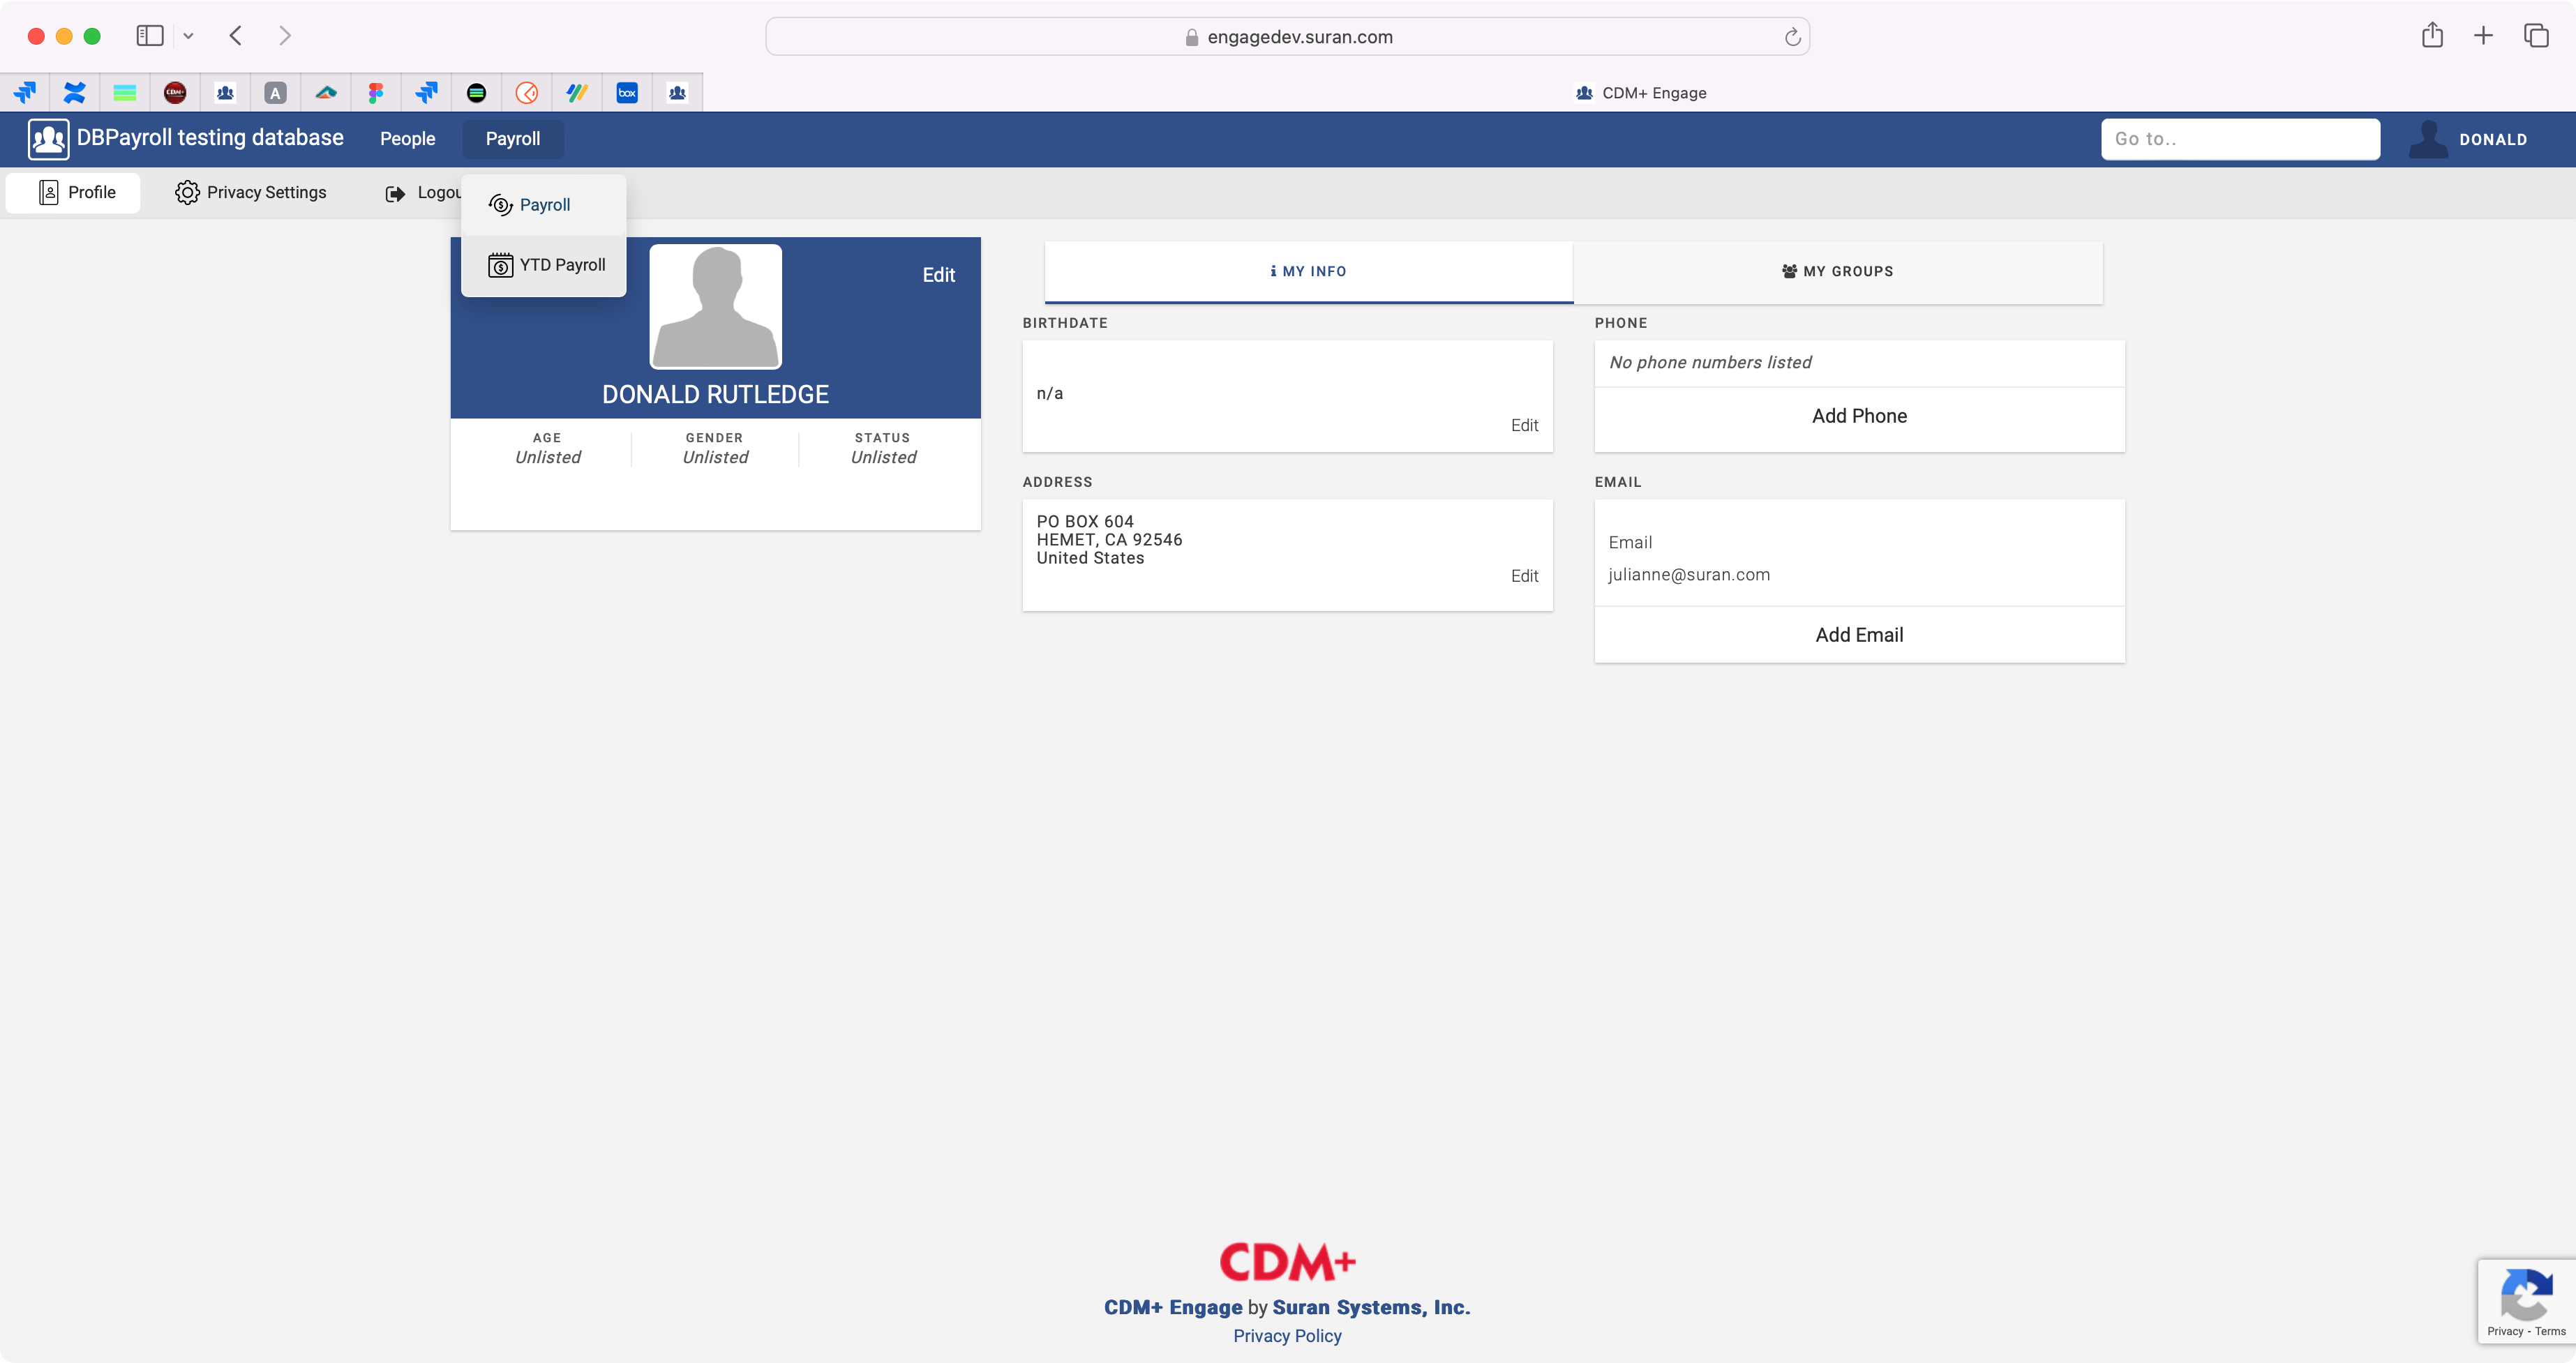
-
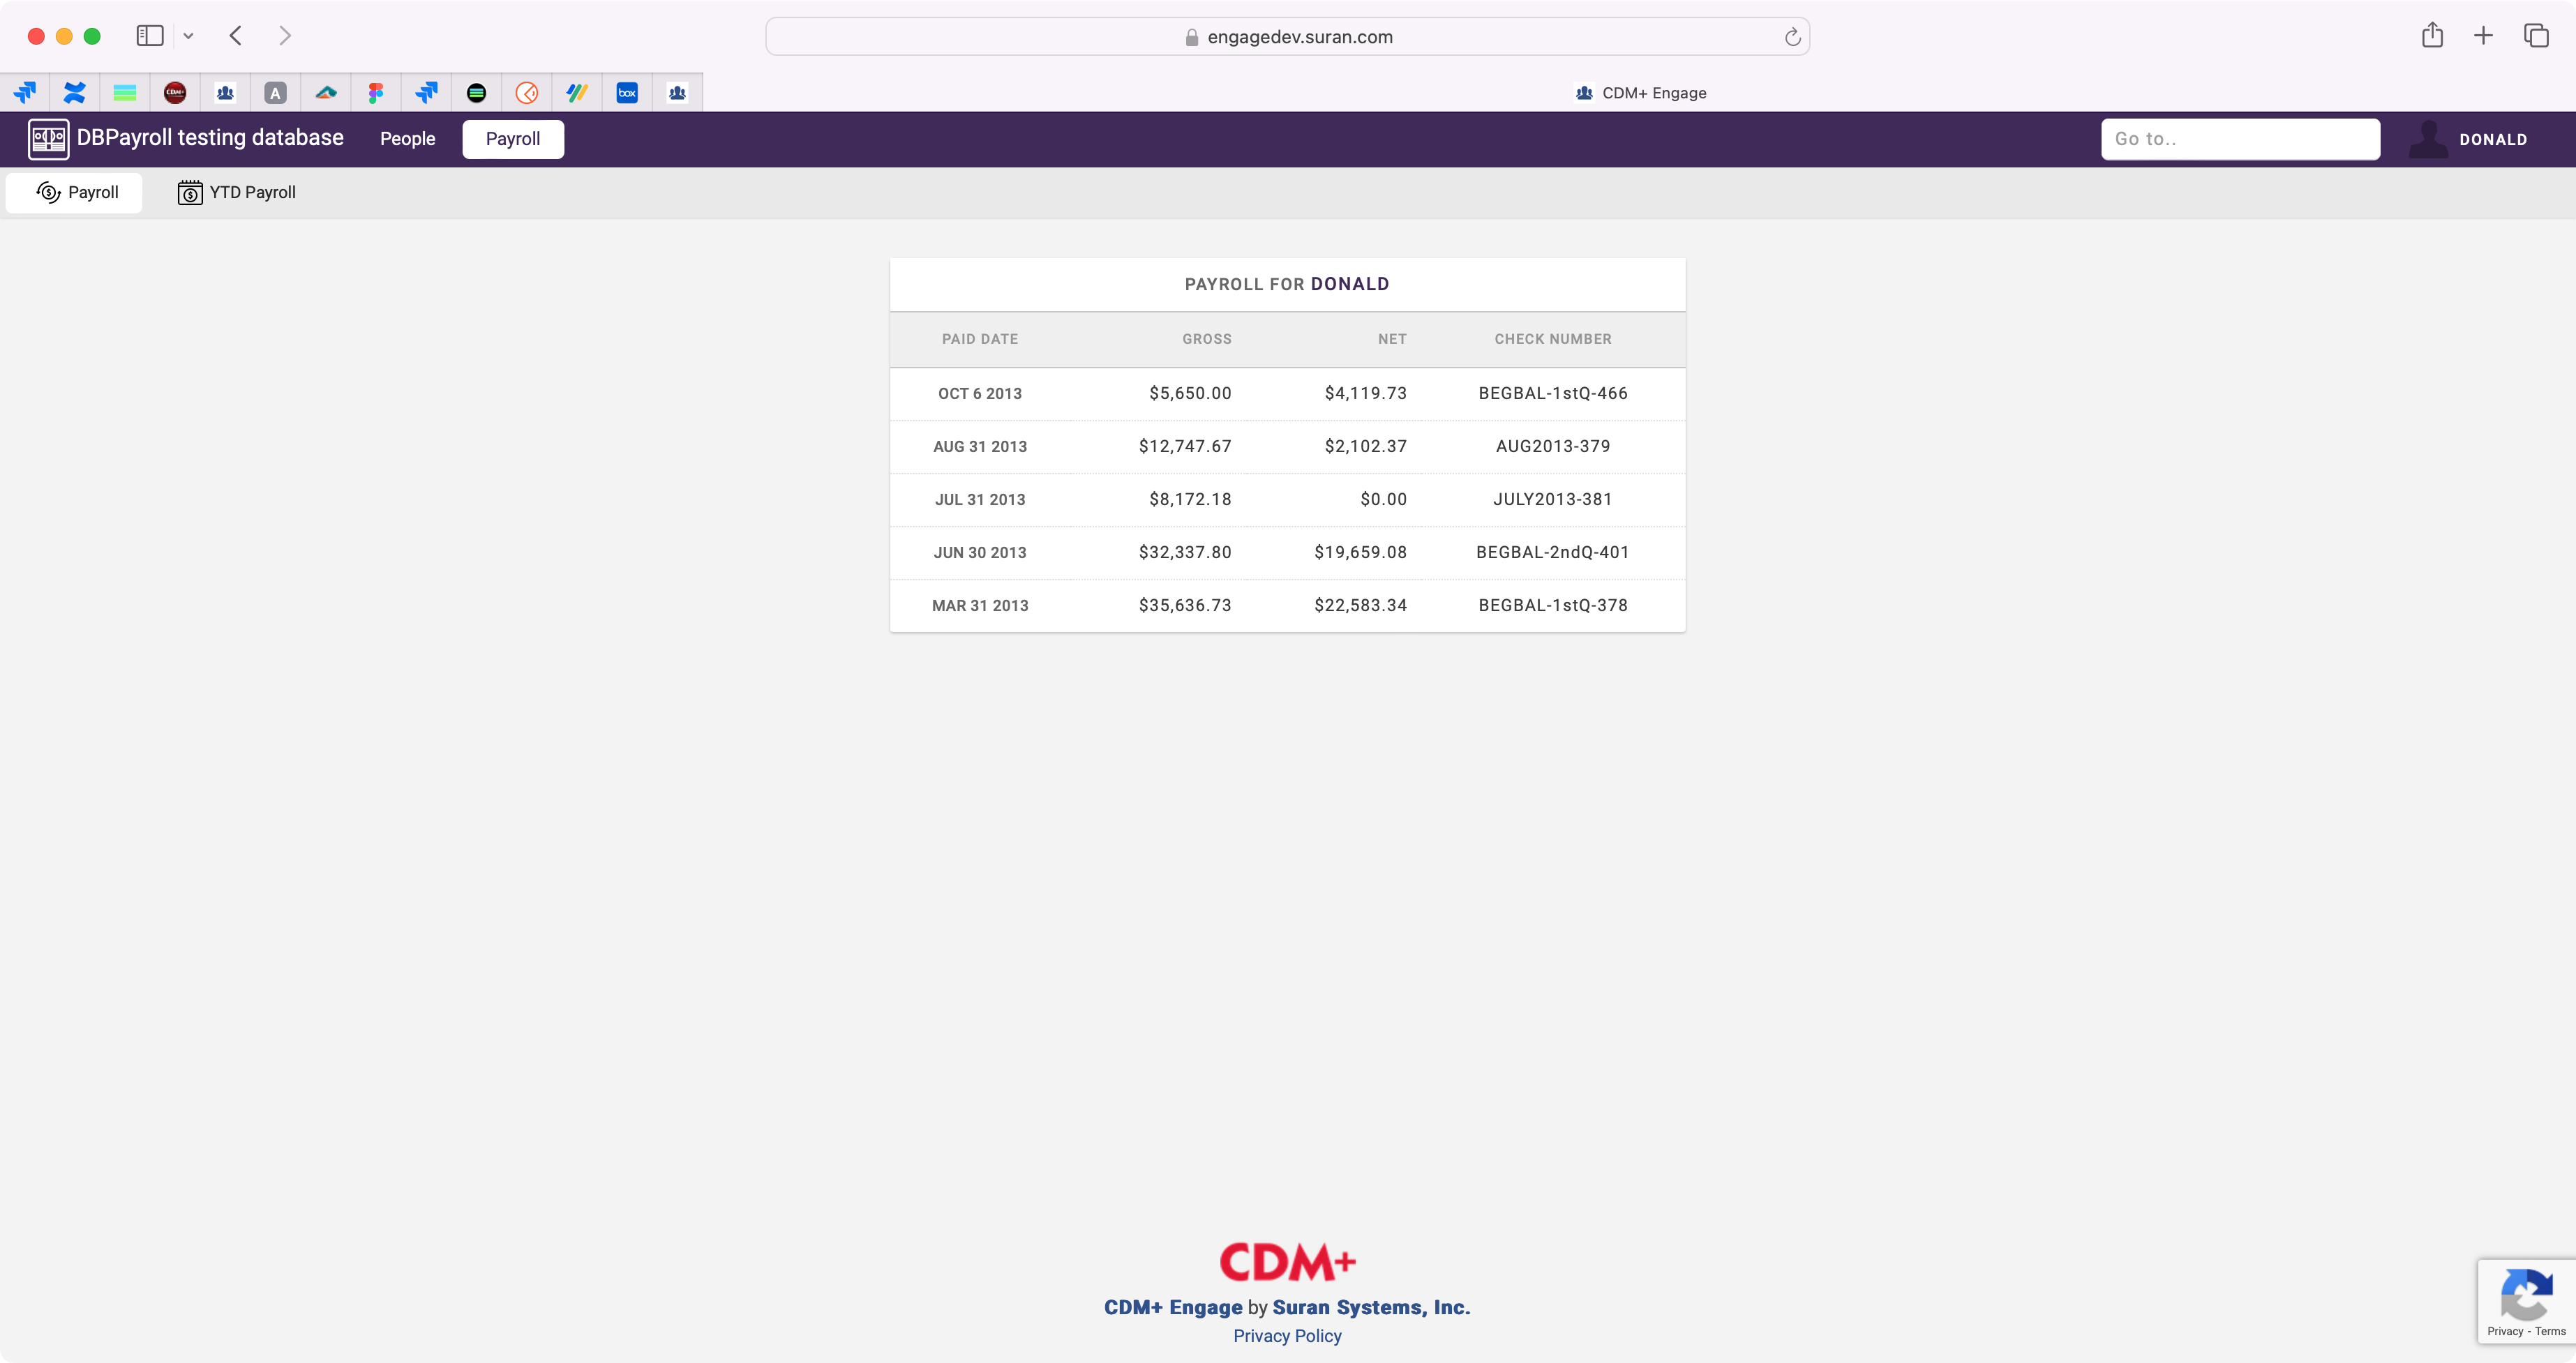
If they click on Payroll they will be able to see a list of their Paystubs.
-
They can click on a specific paystub to see the paystub details.

-
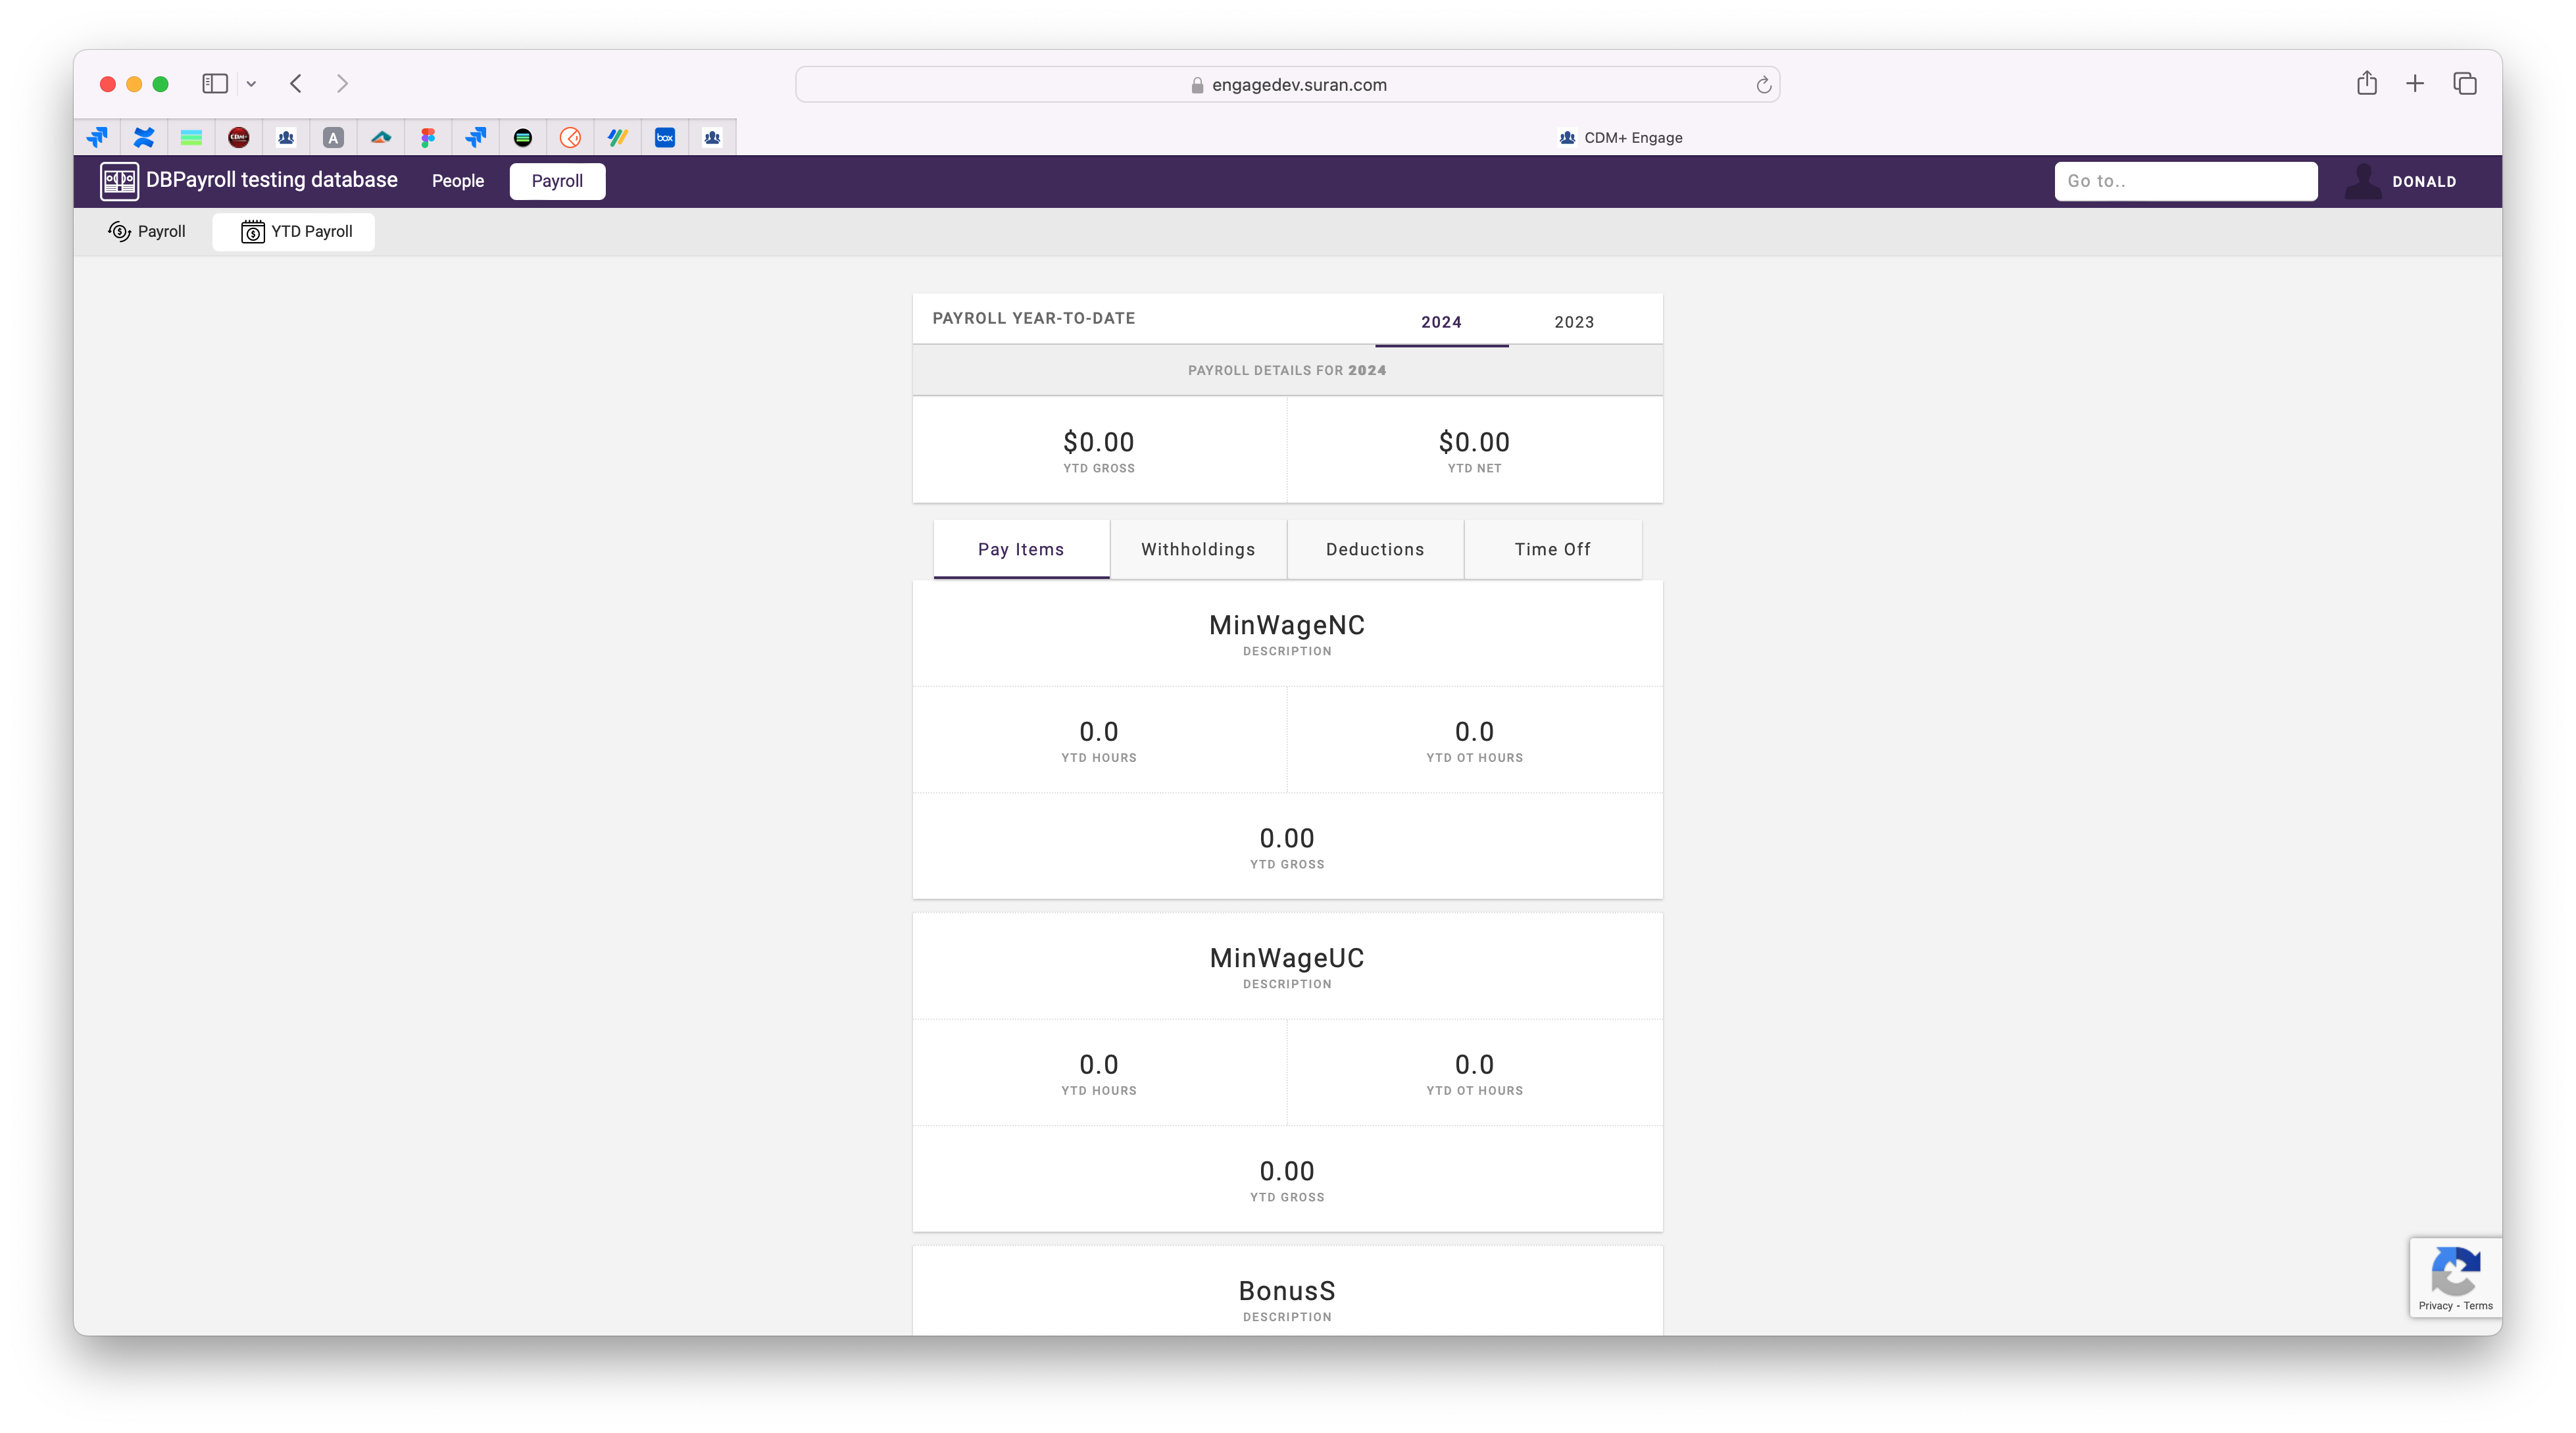
When they click on YTD Payroll they can select the year they wish to view and see their cumulative totals.
Providing DealterBuilt Engage Access for a New Employee
In order for an employee to be able to access their paystub online, they need to be given their DealerBuilt Engage credentials. The steps below outline how to give access to a new employee.
-
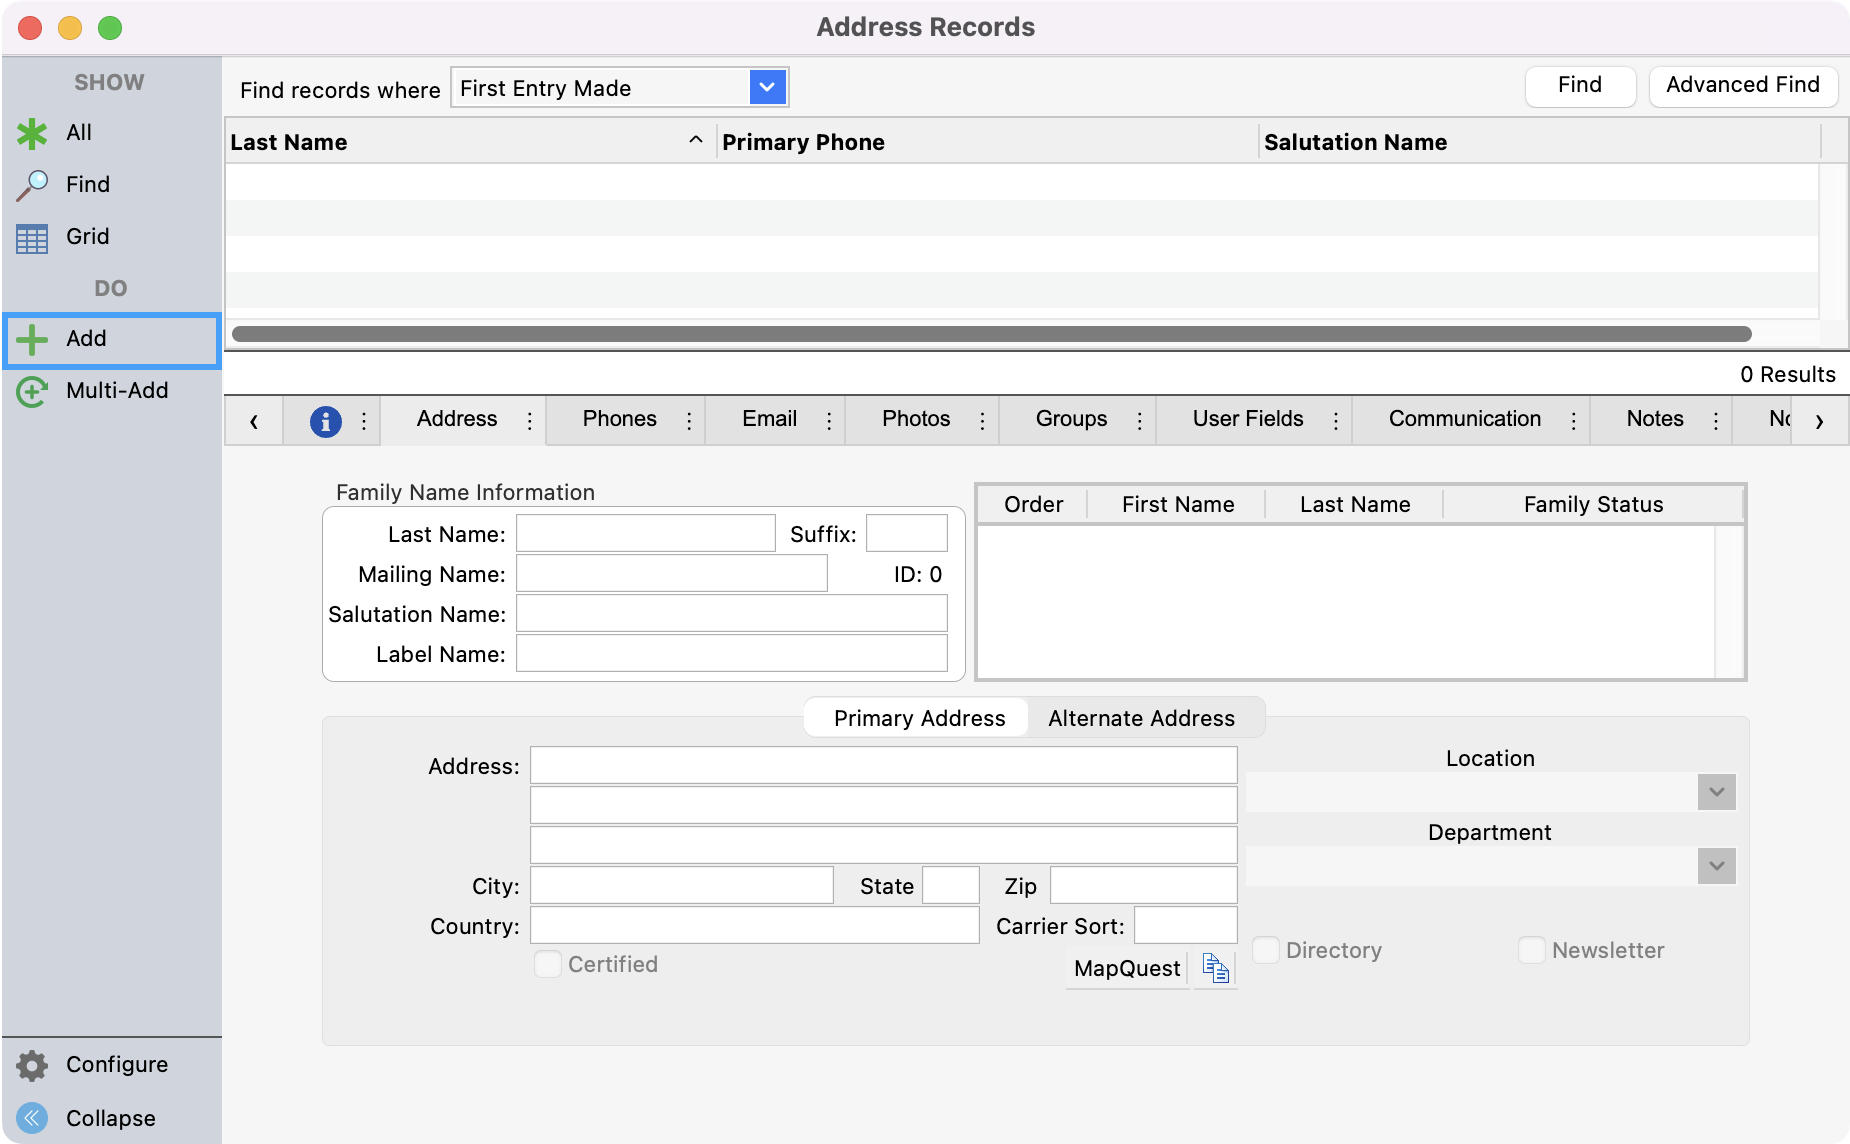
The first steps is to create an Address record for the new employee. You can do this by going to Program → HR → Address Records.

-
In the Address records window, click Add from the left sidebar.
-
Enter in the details for the employee making sure to fill out all fields under Family Name Information and Primary Address. You will also want to add their first and last to the Family Status box. This is what will create their Individual record where you’ll add their online credentials.
-
Before saving the record, click on the Email tab.
-
Click Add Email Address at the bottom of the window and then add the email address for the employee. Then, Save your changes in the upper left-hand corner.
-
The next step is to create the Employee record and tie the Address and Individual record to the Employee record. Go to Program → Payroll → Employee Records.

-
Click Add from the left sidebar.
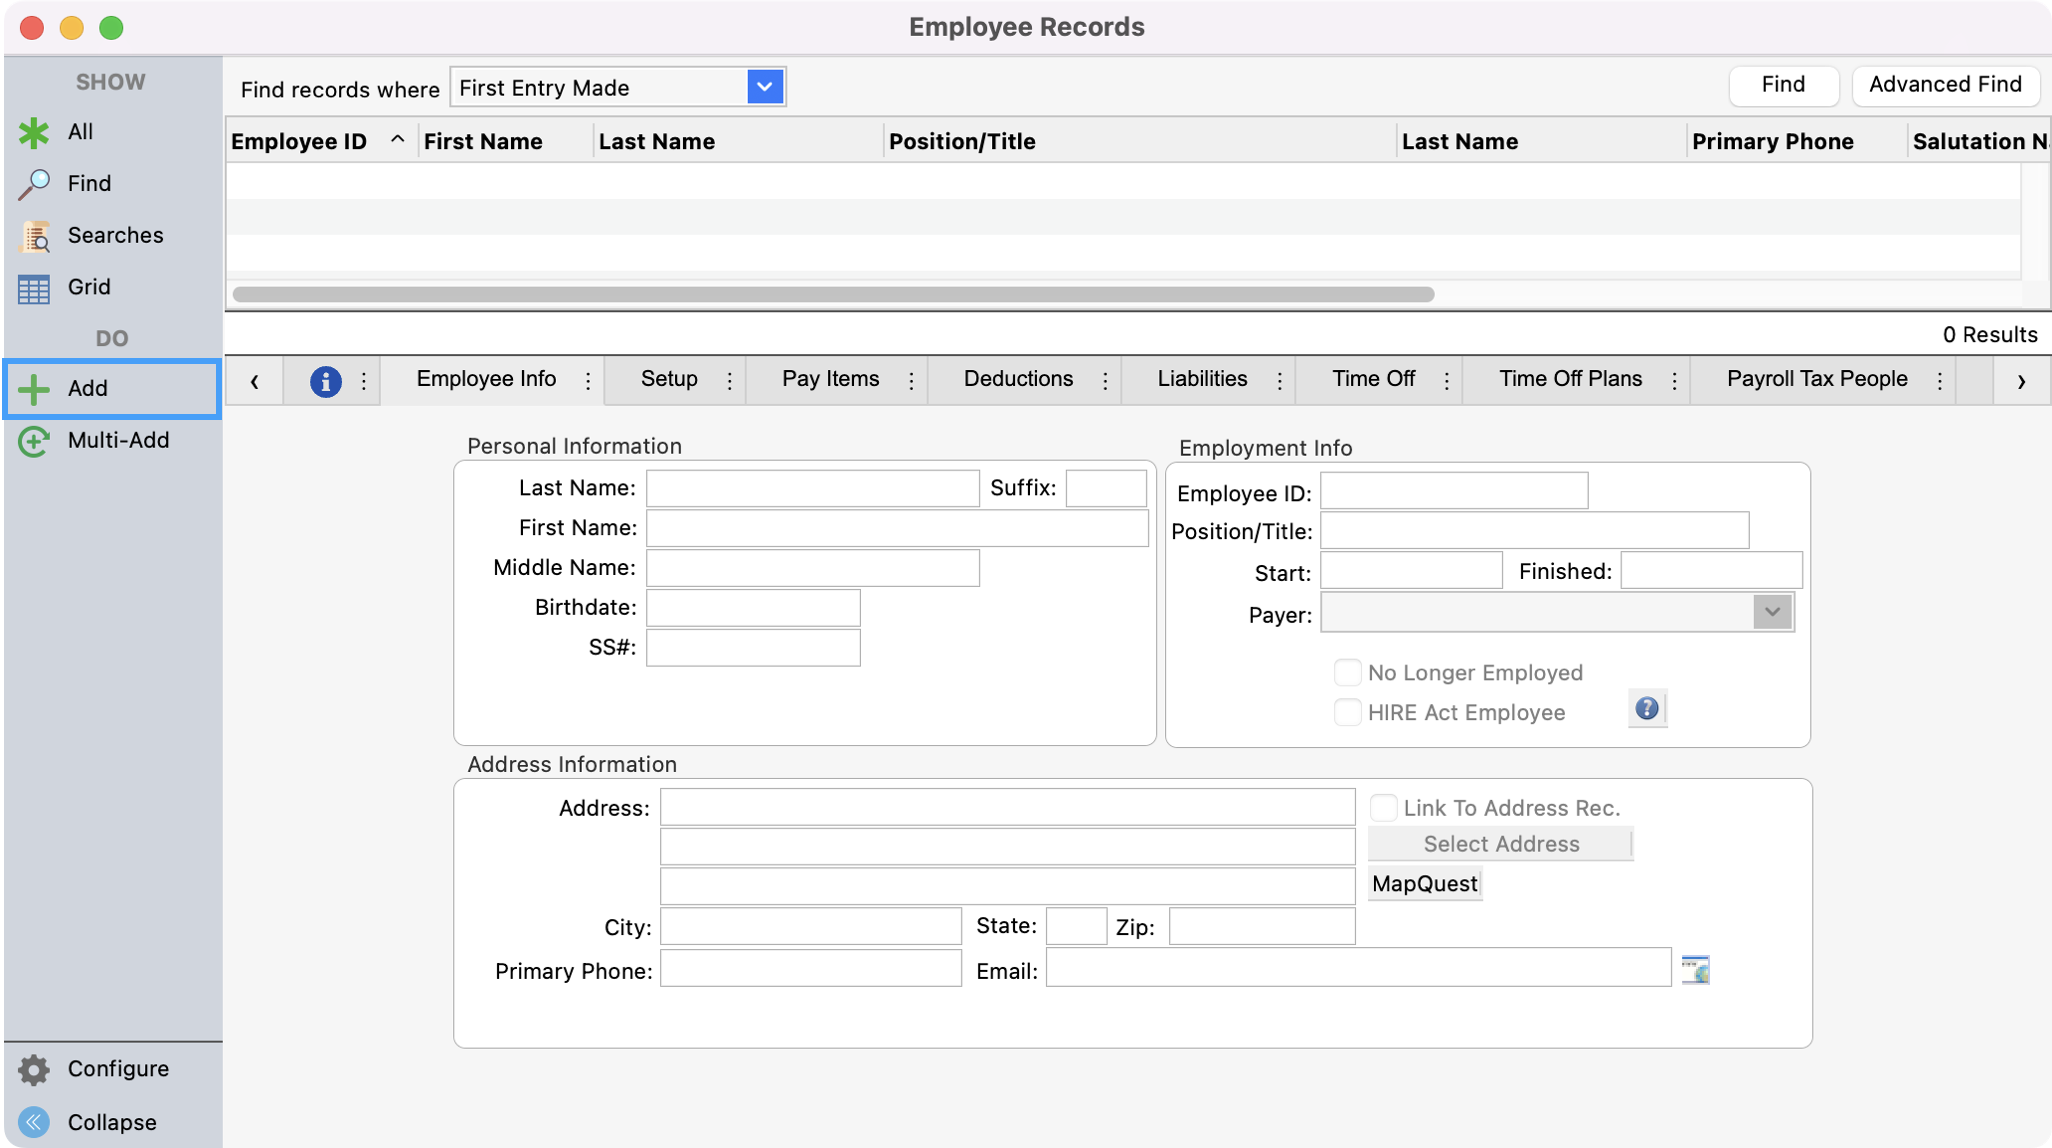
-
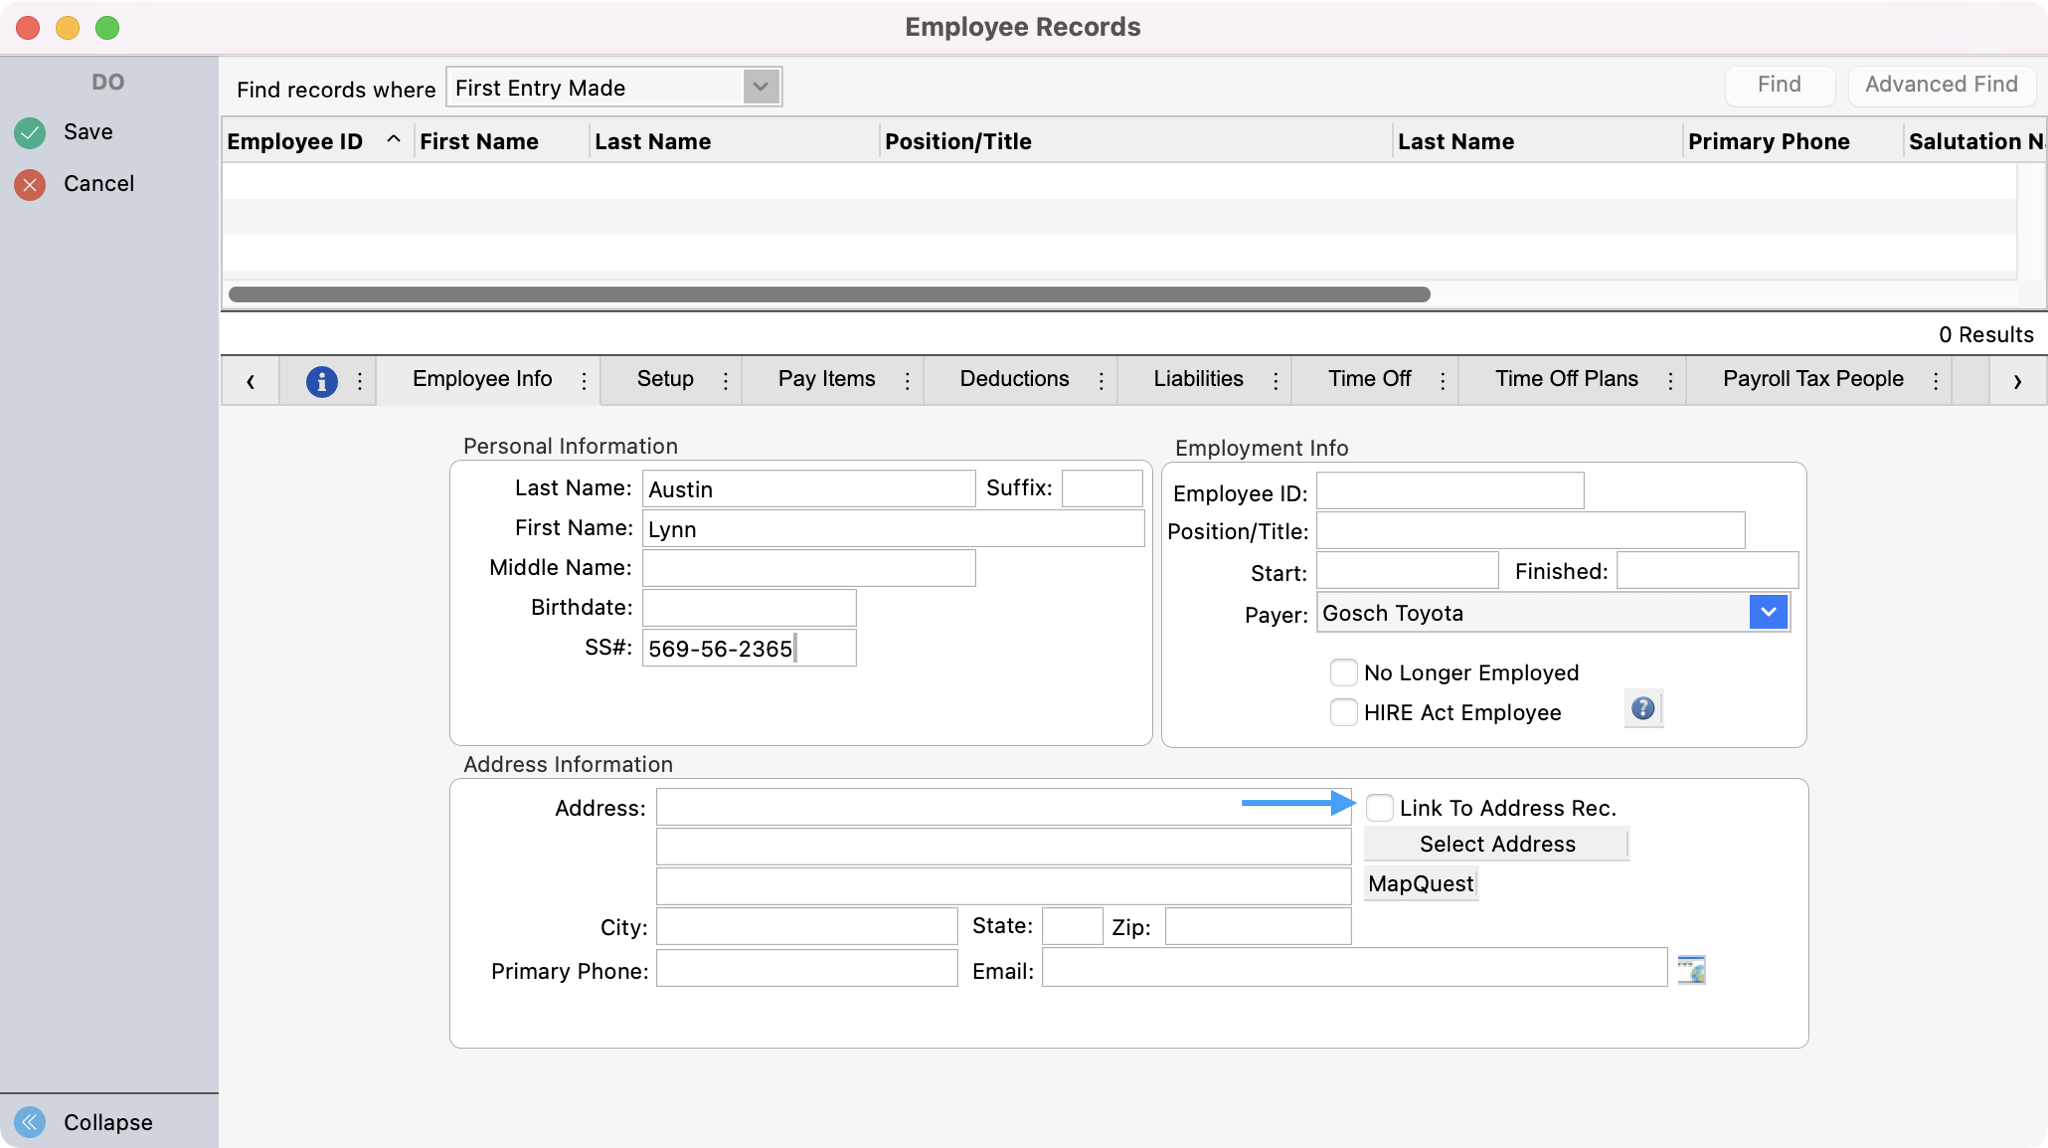
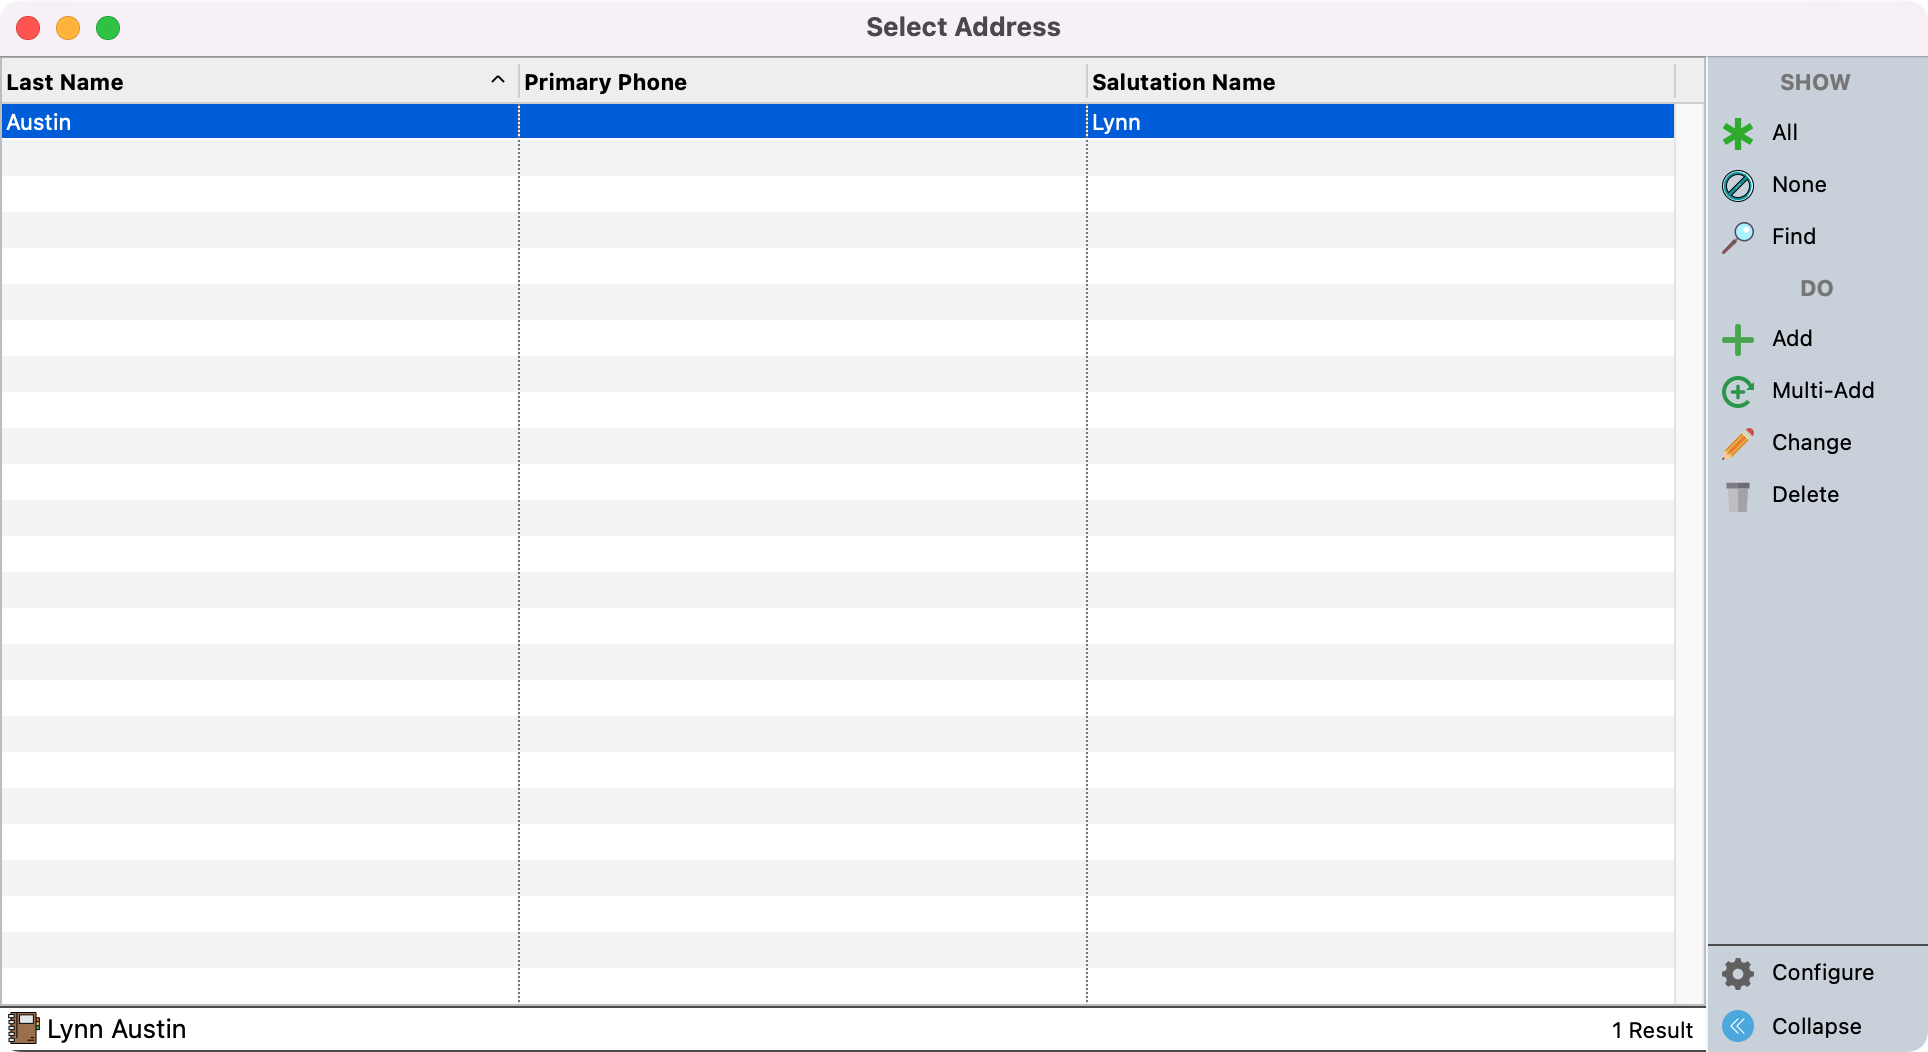
While filling out the employee’s details, check the box that says, Link To Address Rec. You’ll see a pop-up box with the recommended Address record to link to the Employee Record. Double-click on the name to select the Address Record.
-
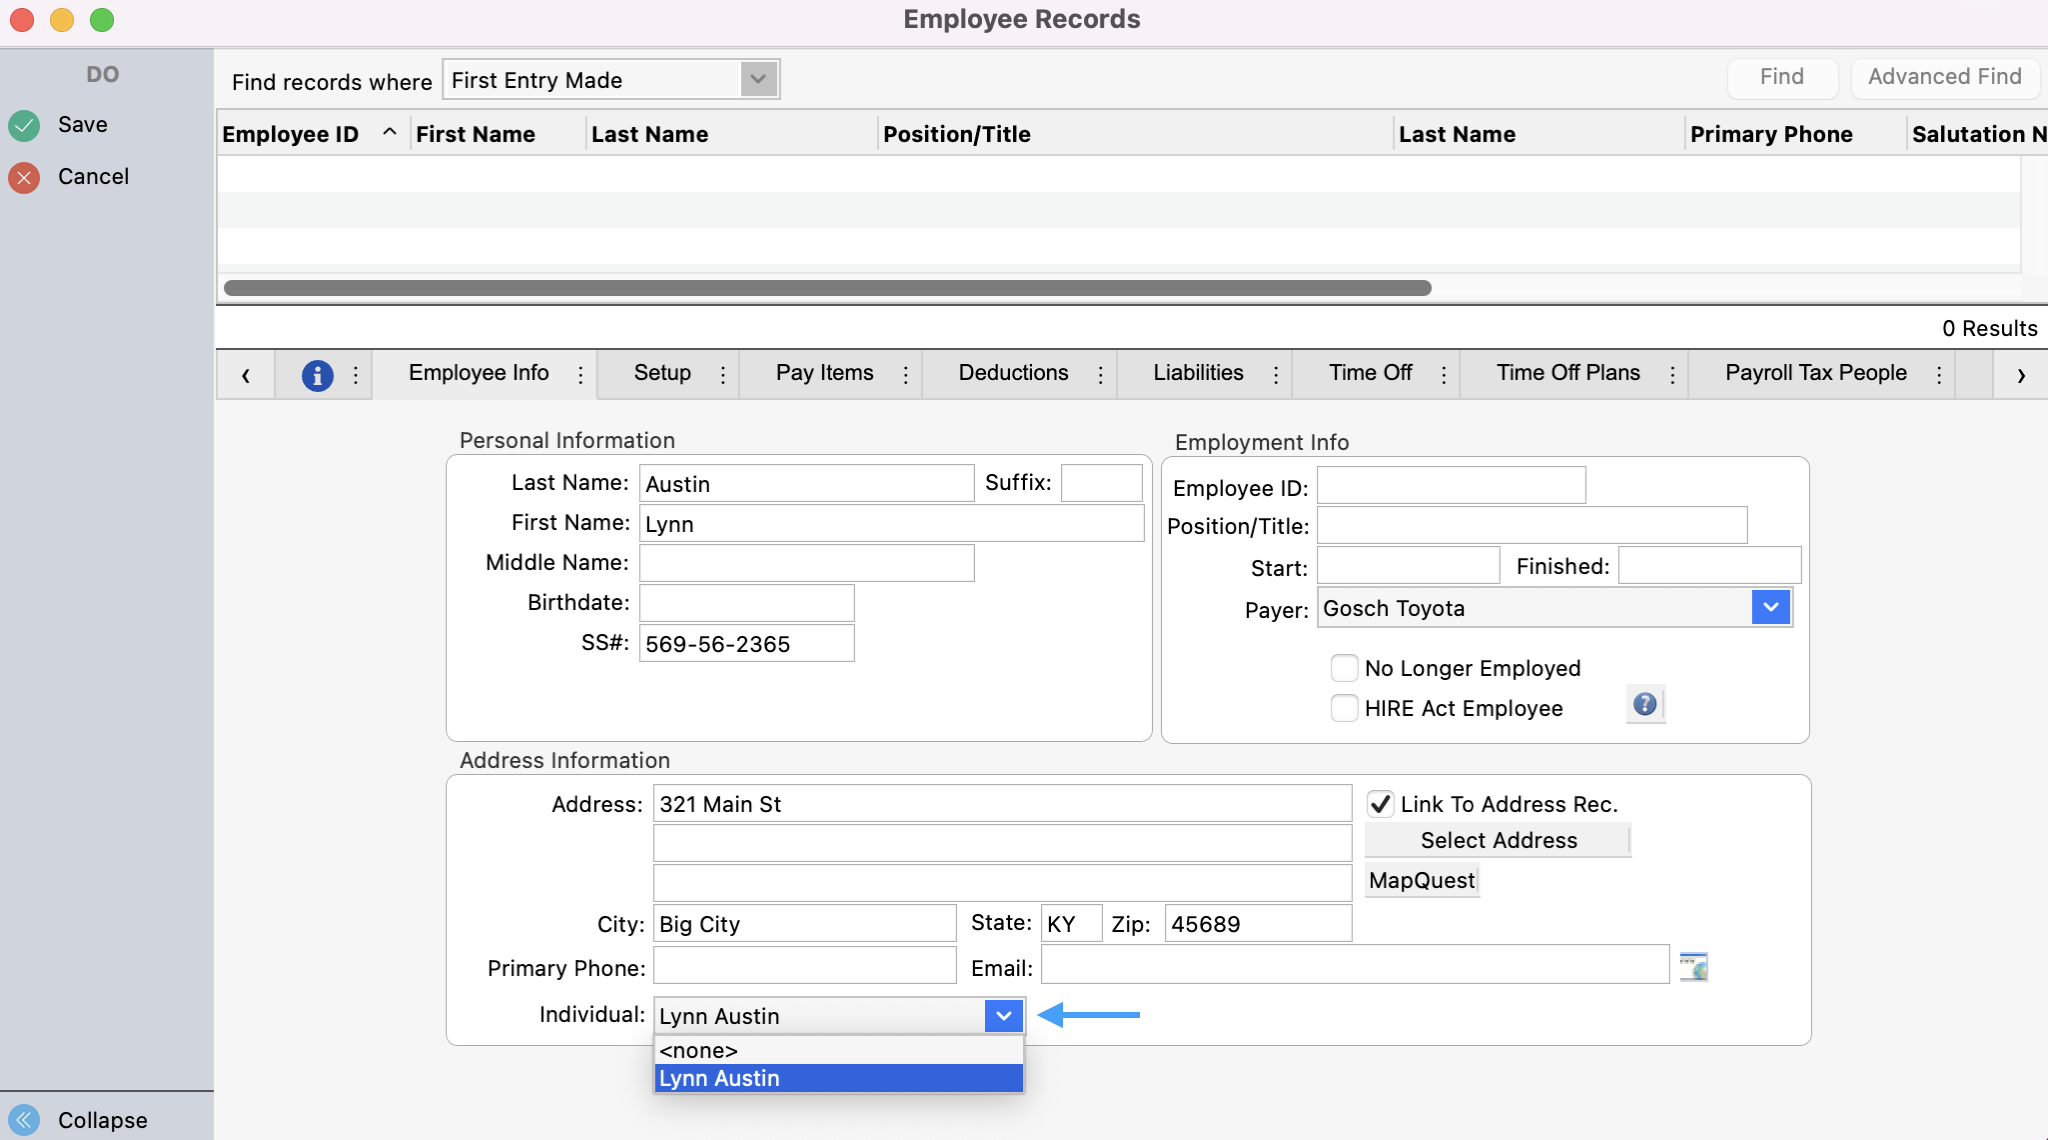
You’ll now see the Address record’s details autofill the fields under Address Information. Now click on the drop-down box next to Individual and select the Employee’s name to link their Employee record to their Individual record.
-
Continue to finish filling out all the tabs for the employee’s record and when finished, click Save in the upper left-hand side.

-
Next, click Individual from the left sidebar.
-
On the Individual record window, click Create Account in the Online Credentials box.
-
You’ll see a pop-up where you can use the default username or edit it. You will also see the email address that will be associated with this account. Click Save.
-
After you click Save, the employee will see a password reset email for them to create their password. They can create their password by clicking on, Click Here.
-
Once they click on the link, they’ll be able to create their password and then log in.
-
Once the employee logs in, they can click Payroll from the top menu. They will be able to navigate to the Payroll or YTD Payroll menu.
-
If they click on Payroll they will be able to see a list of their Paystubs.
-
They can click on a specific paystub to see the paystub details.
-
When they click on YTD Payroll they can select the year they wish to view and see their cumulative totals.